

Obligatory Mechanical Keyboard Post
Early Monday morning this week we hit one thousand followers on our Instagram account, which I know is a drop in the bucket in the scheme of things, but in this increasingly online world, where metrics like these are the only way you can sometimes tell if anyone is listening to what you are saying or if you are just shouting into the void, it feels validating to mark the passage of time with reminders that people are there on the other side of the series of tubes.
So in celebration, this week I thought I would do something a little bit different from the norm, and lean in to that technological side of our existence. I grew up around computers, just barely ahead of the curve compared to my contemporaries. Being forced to deal with MS-DOS Shell and 5.25” floppies if I wanted to play “The Adventures of Willy Beamish” meant learning to troubleshoot from an early age, even if I never formally studied computer science or information systems. I once spent three months working as the help desk technician at an accounting firm because they had let their previous help desk guy go without a back-up plan, and I used to spend my lunch breaks in the server room talking about D&D with the Network Admin, so they figured they would just transfer me into that role temporarily. All of this to say, I have no idea what I’m doing when it comes to computers, but I do a decent job of Googling it and figuring it out.
Which brings us to my most recent non-stationery, non-3D printing micro-hobby adventure, wherein I decided to finally join the world of mechanical keyboards. Unlike pens and printers, though, I didn’t see any use for having more than one, so I wanted to “do it right” from the beginning. So far I think I’m doing so good, but maybe you all will be the real judges of that.
I decided that Father’s Day 2021 would finally be the time, and I would ask my wife to buy me “the” keyboard. I considered strongly the Mac version of the Unicomp Model M, but After reading a handful of reviews I walked away feeling like it’s not best suited as for the person who only has one keyboard, but rather it is a keyboard you can take out and play with for some nostalgia and then put away and take out something else that’s built a bit sturdier the rest of the time (I say with absolutely zero basis or experience.) Next I was drawn to a particular color of the Leopold FC980M, and this was almost the one I went with, but the fact that I had to choose my switches up front and live with them didn’t appeal to me. The Leopold keyboard has its switches under each keycap soldered onto the board, so while you can choose from a list of options when making your purchase, and if you are so inclined you can probably desolder and resolder these switches, my goal was to make this an easy one time set-up (as in, going through the stages of buying a keyboard one time, buying switches one time, buying key caps one time, etc.), not to create a new daily hobby in my life. And I had no idea what type of switches I might like (more on that later) so I decided I needed a keyboard with hot-swappable switches that didn’t require soldering at all. This lead me to Keychron, and the final two keyboards I considered: the K4 and C2.
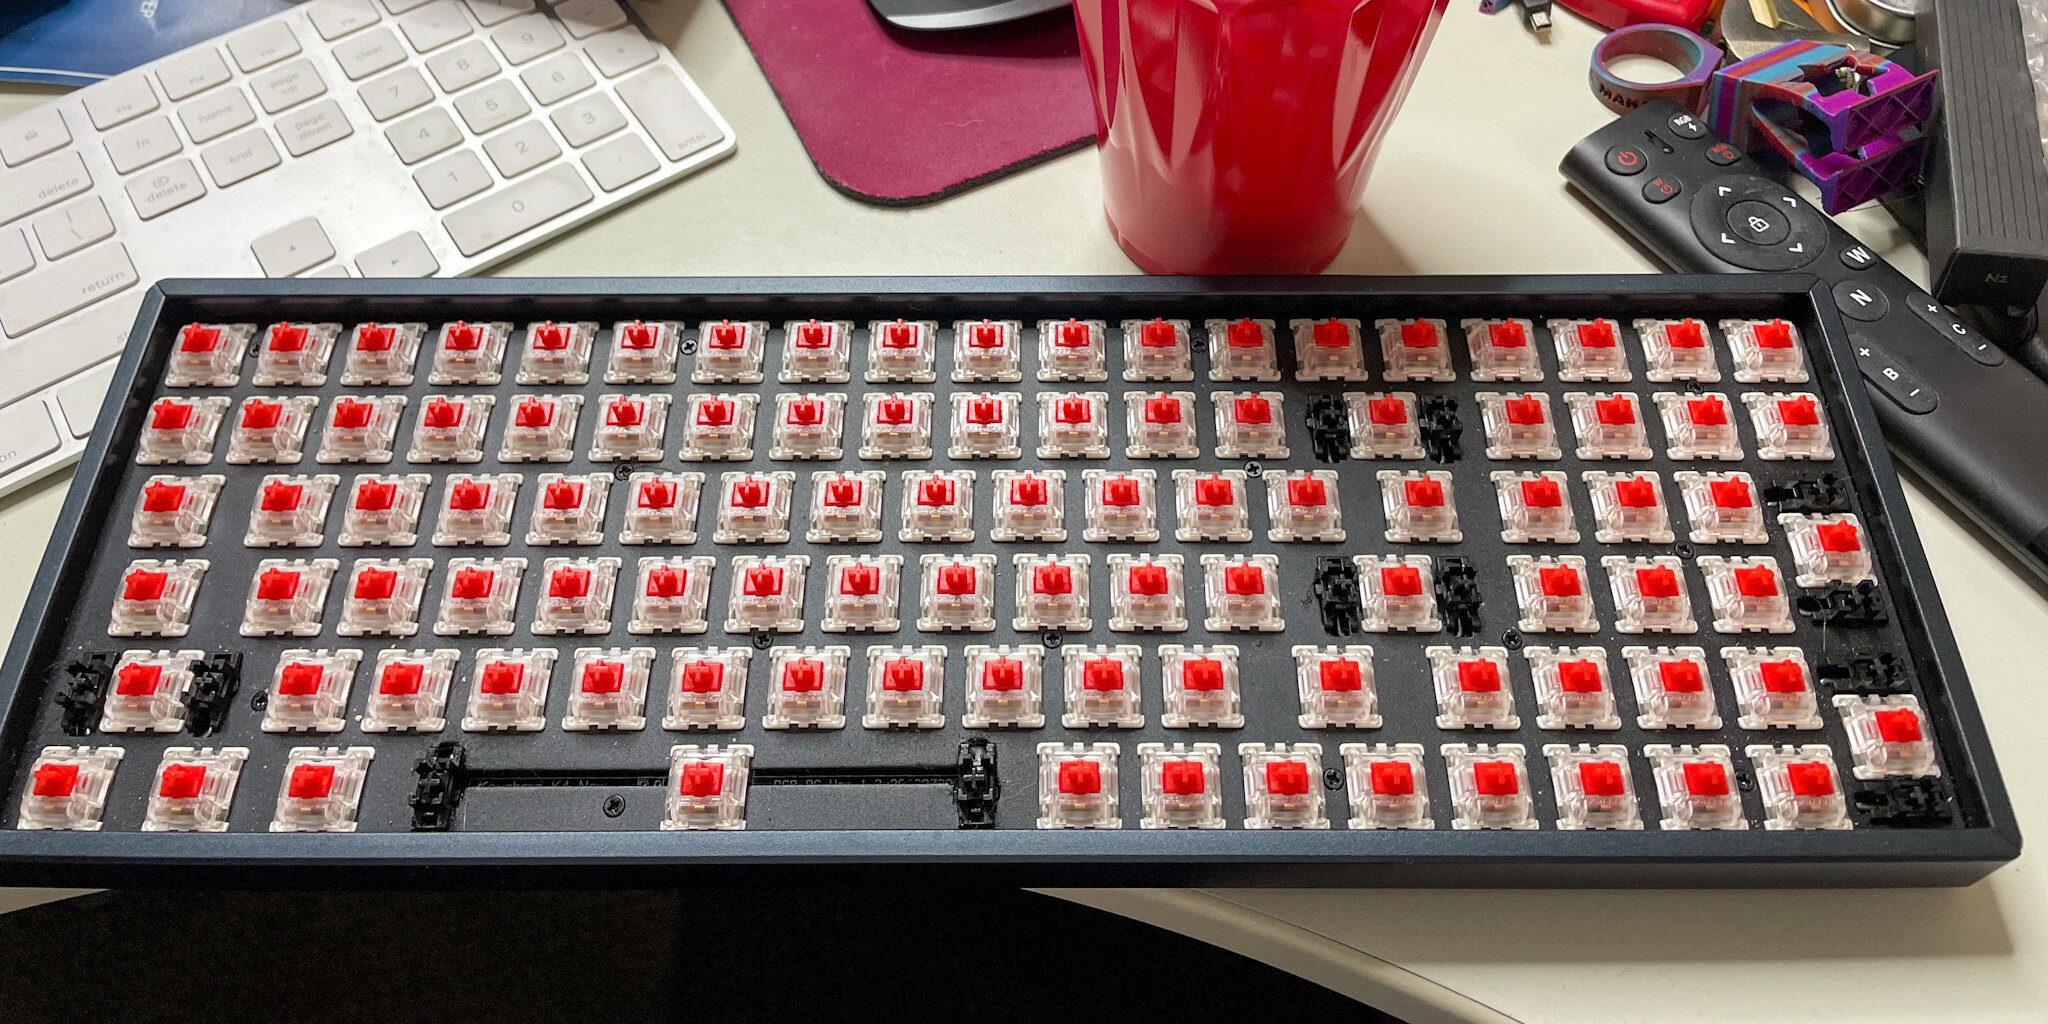
I had two big constraints in looking for keyboards that limited my options, but in some ways also made it a quicker search to get to the point I was at with my final two boards. The first was that I primarily use Apple products, so Apple compatibility is an absolute necessity for me, to the extent that compromising even on keys for screen brightness and volume would be a big negative impact on my workflow. The second is that I am a heavy user of the number pad, and have zero interest in ever giving it up. I loathe typing on compact laptop keyboards specifically because of the lack of number pad. There was no way that I would choose an option would a full number pad available to me. So I was left with the Mac-forward offerings from Keychron, choosing between the compact K4 keyboard, sporting an 1800 layout similar to the Leopold I’d seen previously, but without the gaps, or the C2 keyboard with its keys a little more spread out. The K4 would mean losing a handful of keys that I never really use anyway, but in exchange I’d be getting Bluetooth and an internal battery. The C2 would give me separation between areas of the keyboard, but in a larger footprint and I’d always be tethered to my machine. Both had hot-swappable switches and RGB background LEDs. In the end, I decided that the ability to take my keyboard with me and use it as a laptop keyboard replacement, even once, trumped that key separation, and I could always get different colored keycaps later to differentiate different sections, and the K4 won. Because I had no idea what I wanted in a switch I chose the linear red switches. I also opted for the premium aluminum model over the plastic one, even though it’s only a little bit of aluminum accents around the edges, because it’s only a few dollars more, and some times it’s just nice to have the nice things. .

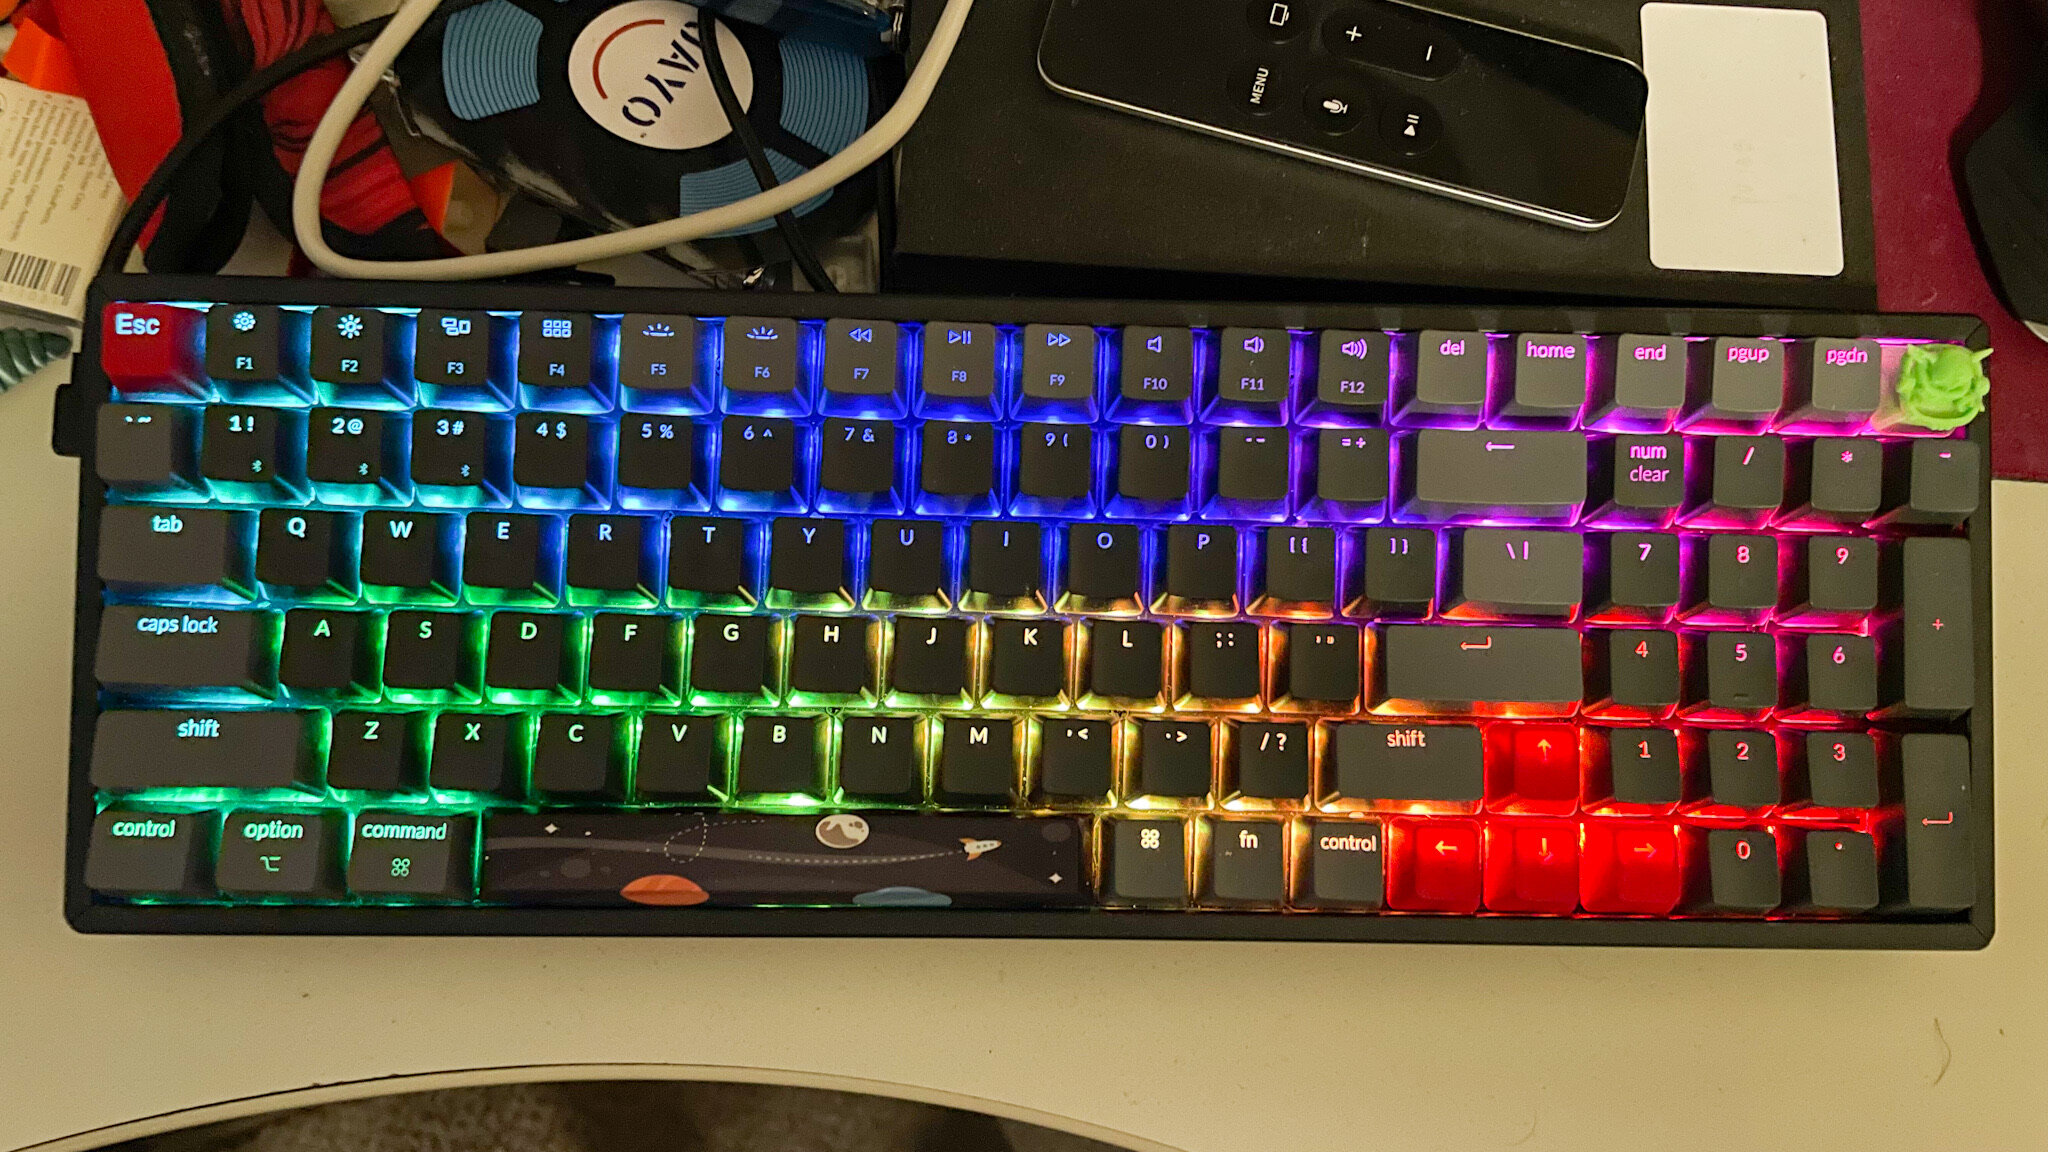
I discovered a few things very quickly once I got this keyboard out of the box. The first was that I really loved it. I could tell right away that I was going to be happy with my choice even if I managed to find faults in it. The second was that I did not like linear switches, which wasn’t a big deal because I always planned on replacing the switches. And the third thing was that I couldn’t see the key markings all that well in the light of my home office and definitely needed to color code different sections of the keycaps as I moved forward..
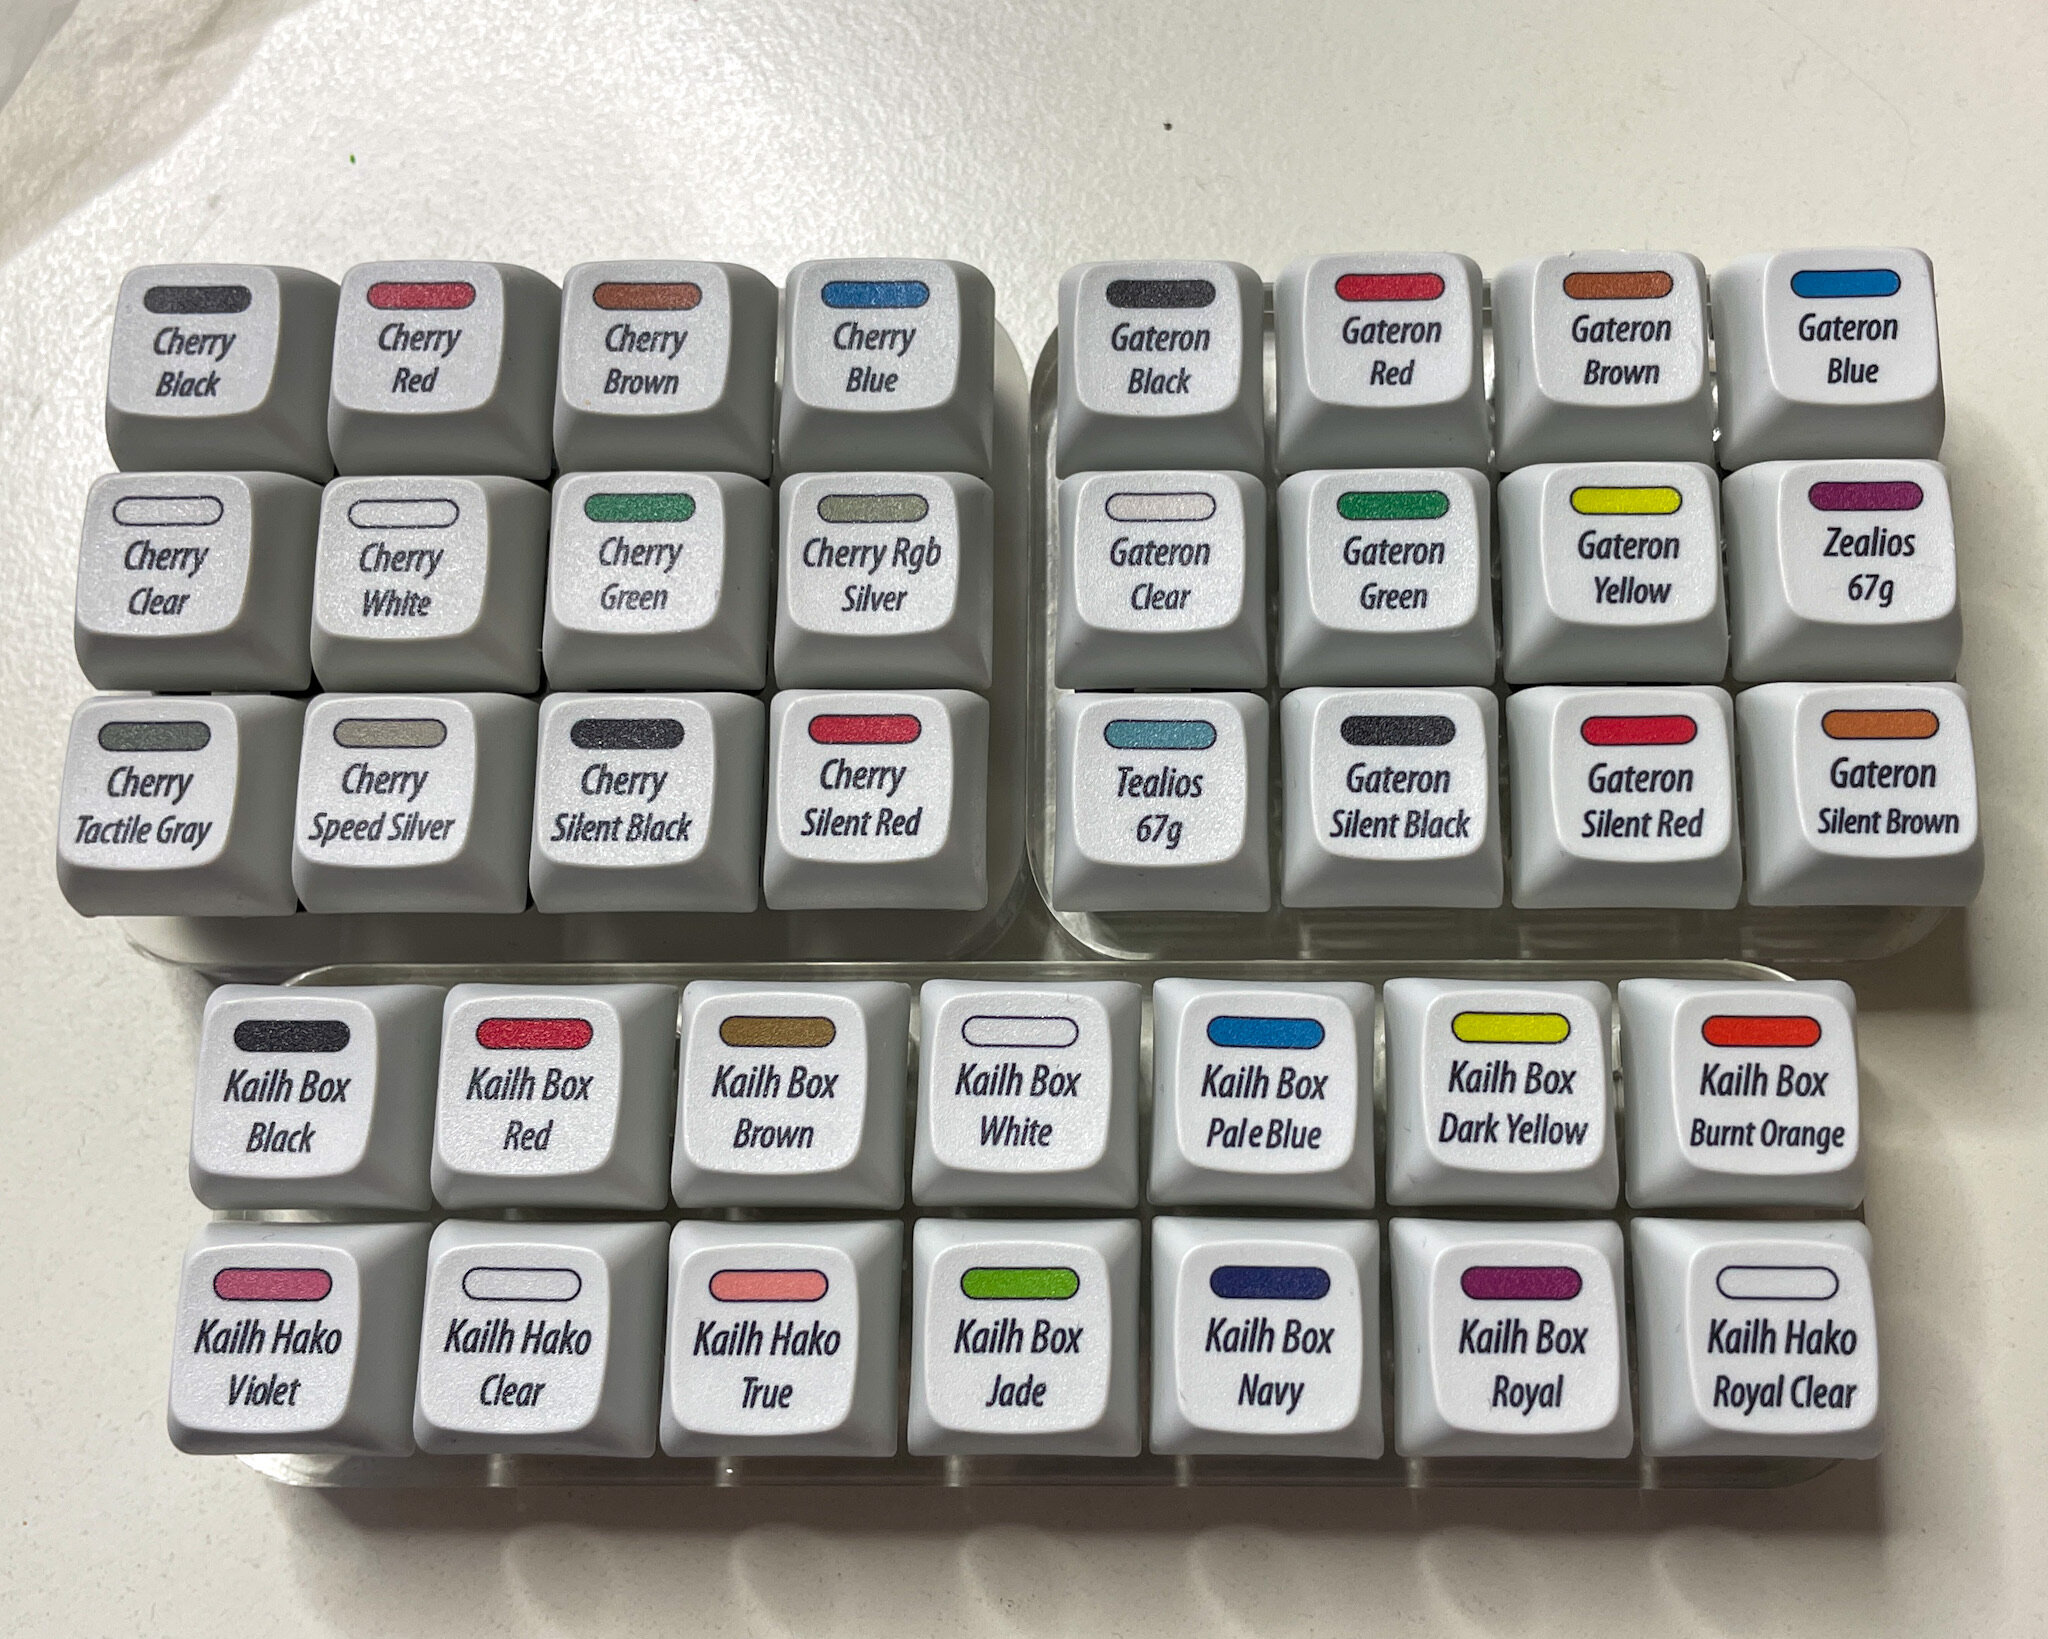
For those who are unfamiliar, like I was, there are three main types of keyboard switches. You have Linear switches, which press straight down with no added resistance, just the tension of the spring itself. You have Tactile switches, where you feel a bump of resistance part way down as the switch actuates. And then you have Clicky switches, which are more or less the same as Tactile switches that have extra bits added to them to make noise as the switch is actuating. These are generally said to be inspired by old buckling spring mechanisms, like those found in the IBM Model M keyboard, which naturally made a sound as part of their performance. But for modern Clicky switches the sound is all performative and artificial. Linear switches, because you feel no difference while pushing them, generally need to be pressed straight down and bottomed out, but alternatively with no resistance in your way they are often popular for video game purposes. Tactile and Clicky switches, on the other hand, can be released early, once you feel the key actuate, and are preferred by typists, with the breakdown depending on whether they like to hear themselves type or not (and whether they intend on typing in a public place where other people might be and hear them .
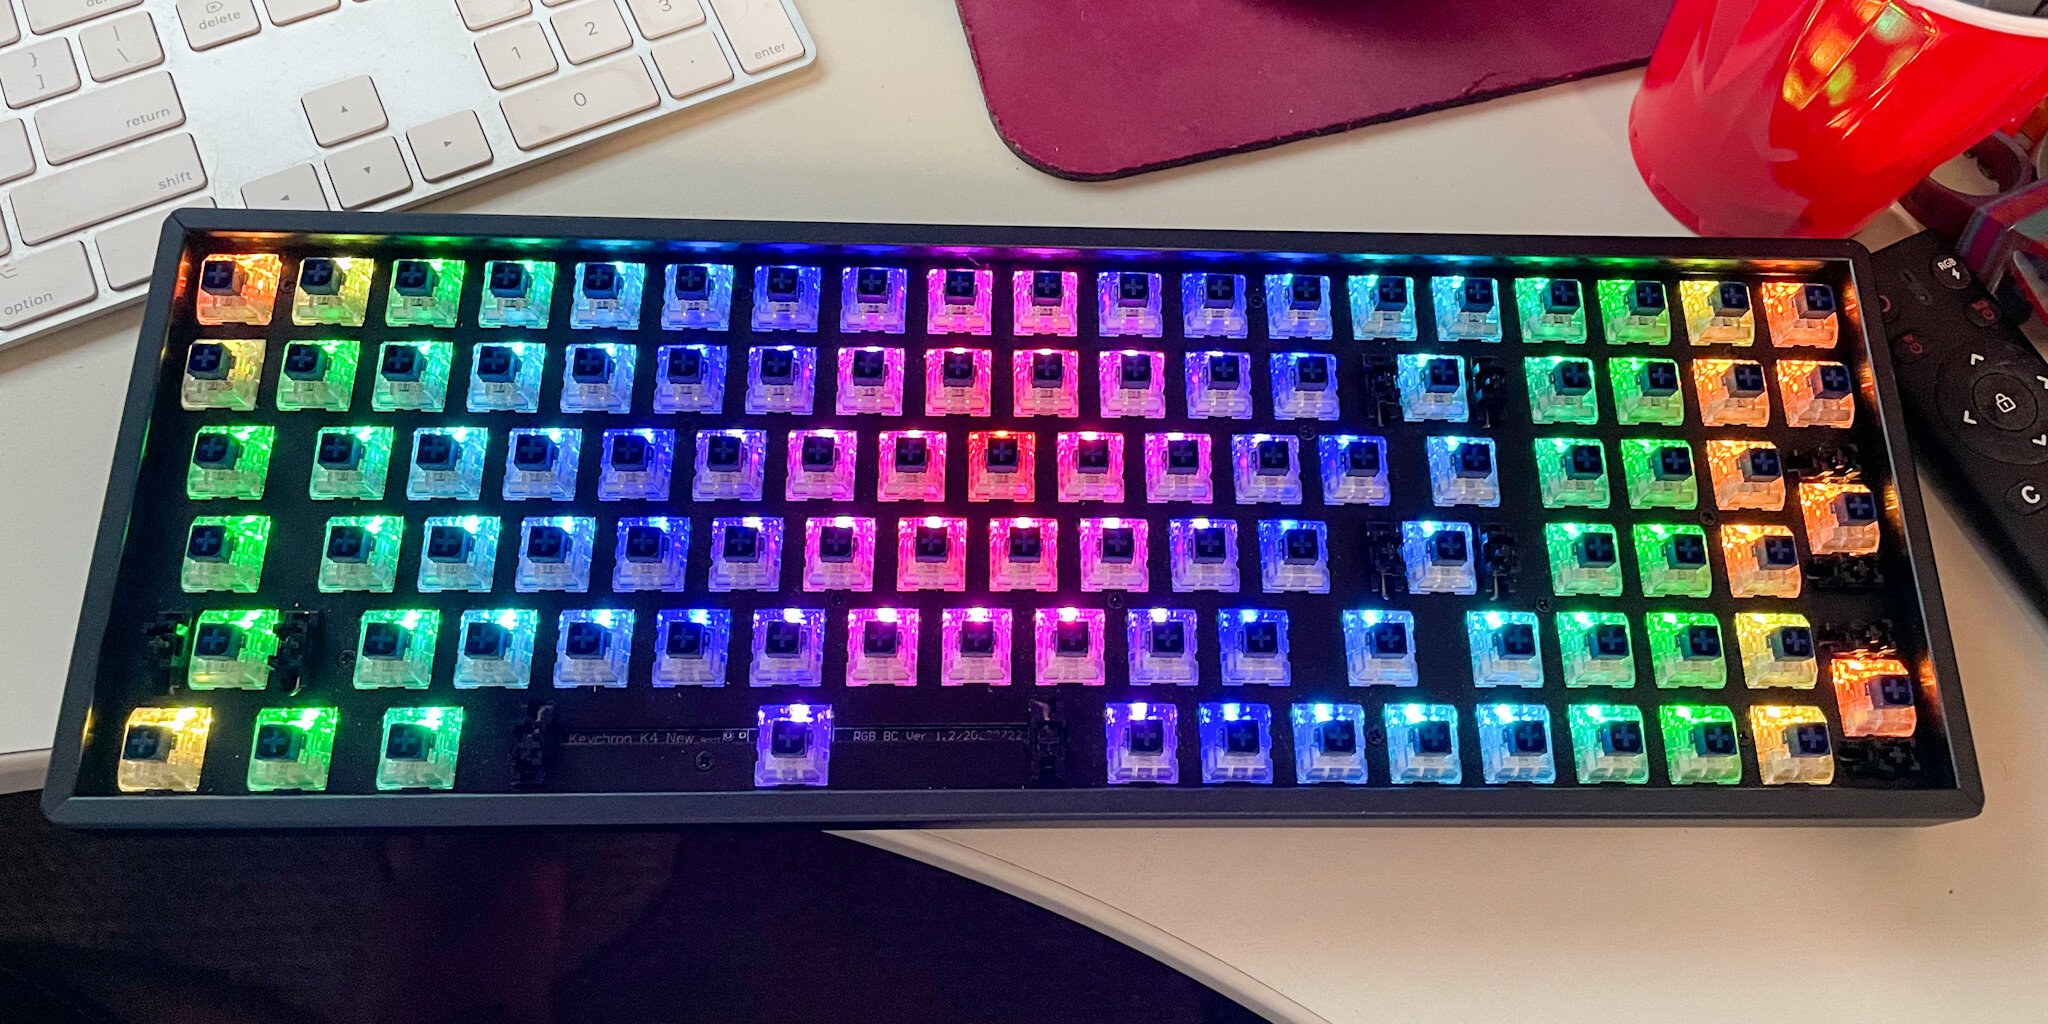
But there are far more than just three switches in the market, or even just three switches from the same manufacturer. The added differences between switches are things like the amount of resistance the spring provides, how loud the clicking is, whether the switch only clicks once when it is pressed, or if it clicks a second time when it expands as well (like certain Kailh switches.) There are a crazy number of options out there, and the only way to know what you like is to physically feel them. So that’s what I did. I ordered a few switch samplers from Amazon, tested them all in the acrylic casing they arrived in, and then chose a selection of the ones that intrigued me the most to install directly into my keyboard to really get a full feel for. I ended up finding that I was a fan of the Kailh Box Navies, which are a Clicky switch from Chinese maker Kailh that requires a heavy amount of force to press, and makes noise kn the way up and the way down. The Box Jades that I tried were a slightly lighter version of the same thing, and the Zealios surprised me as maybe my favorite Tactile switches. Thanks to the hot-swap bird it was easy to test these switches in and out like this to be sure, which I was grateful for.
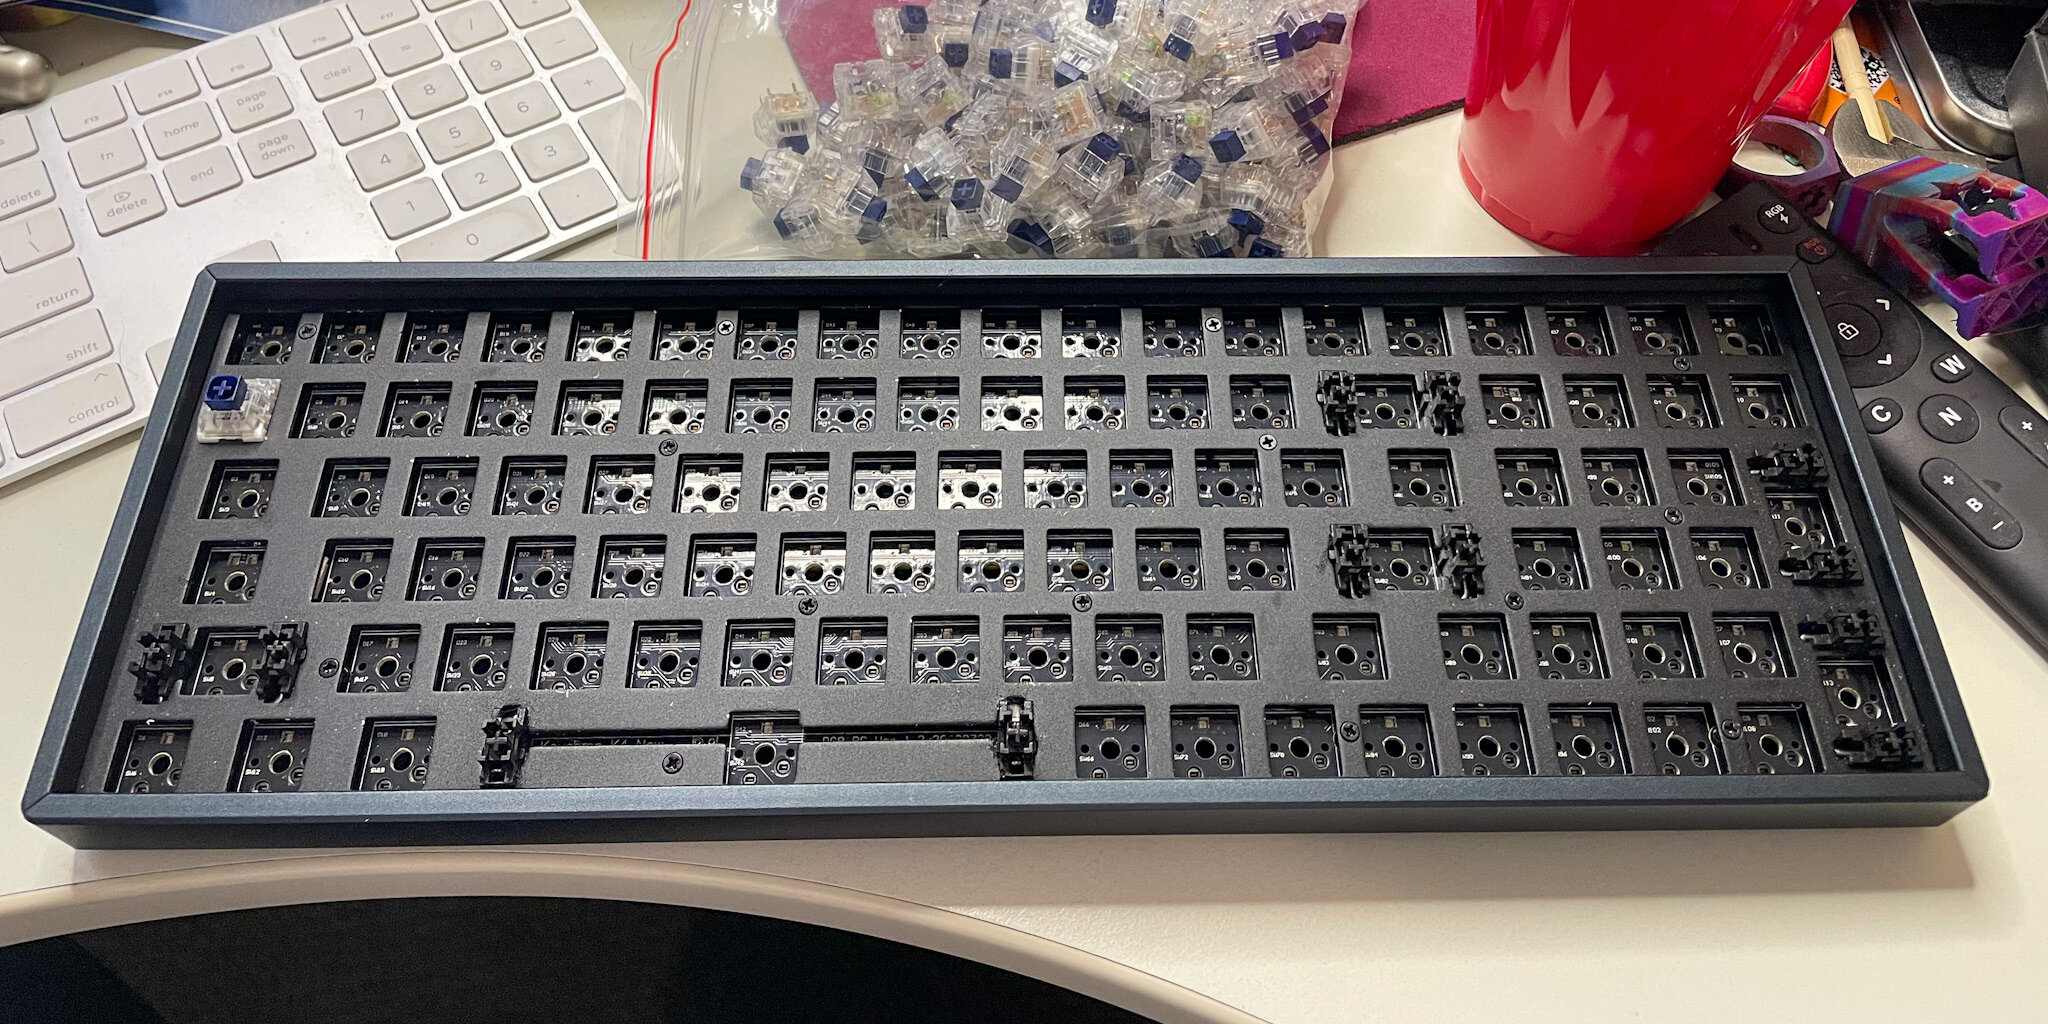
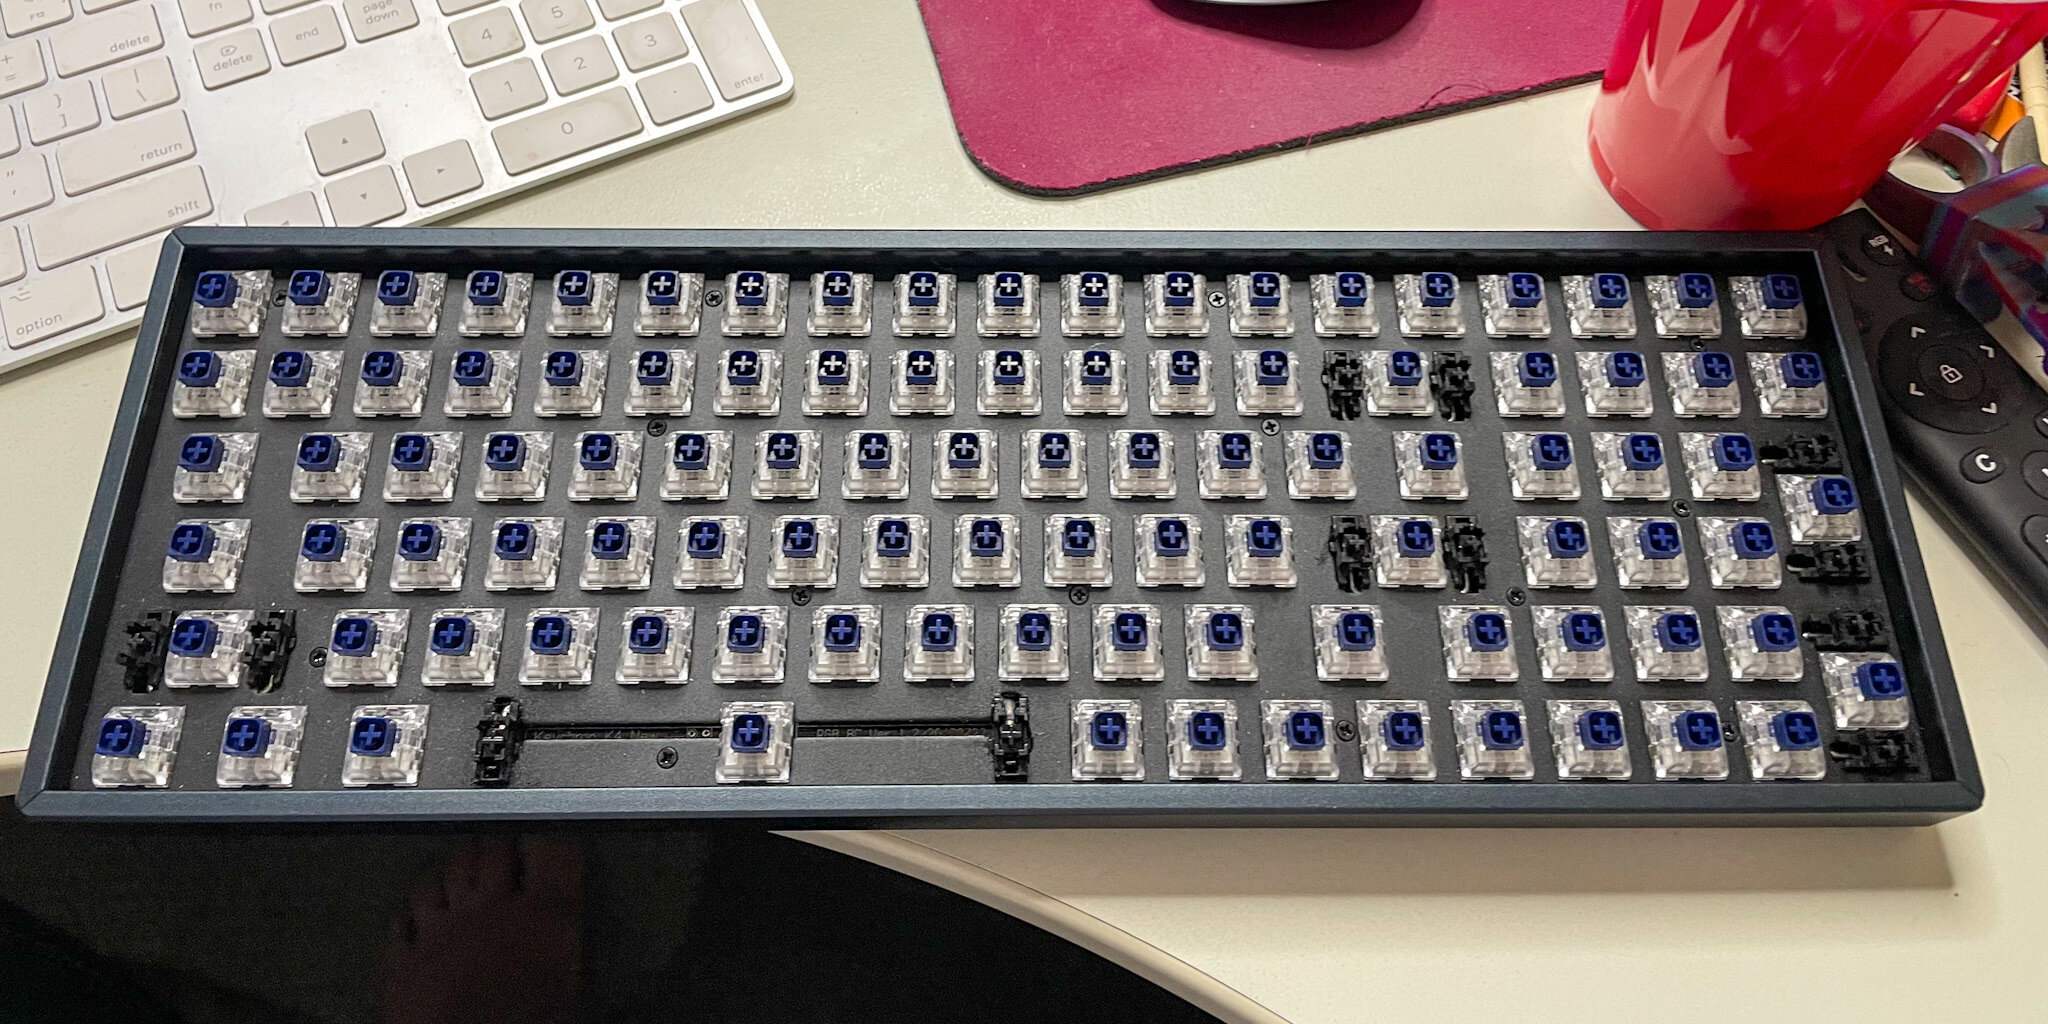
I went online to order my Box Navy switches and discovered the existence of yet another switch, the Crystal Box Navy. The main difference in the Crystal switch is that the Switch chassis is transparent, allowing for the RGB LEDs that I have to shine through even better. However, the Crystal switches had a couple of extra protrusions on the bottom, which fit fine in most of the spots on my keyboard, except for the tilde key. Because the power cable plugs in under the gilder key it is limited to what are referred to as “three pin” switches, and can’t accepted “five pin” switches (the fourth and fifth pins are just pieces of plastic) so I decided to order 99 Crystal Box Navies, and 1 regular Box Navy for my Tilde key. I could in theory have just cut off the two extra pins from a crystal and put it in my Tilde key just fine, but I didn’t want to risk messing it up.
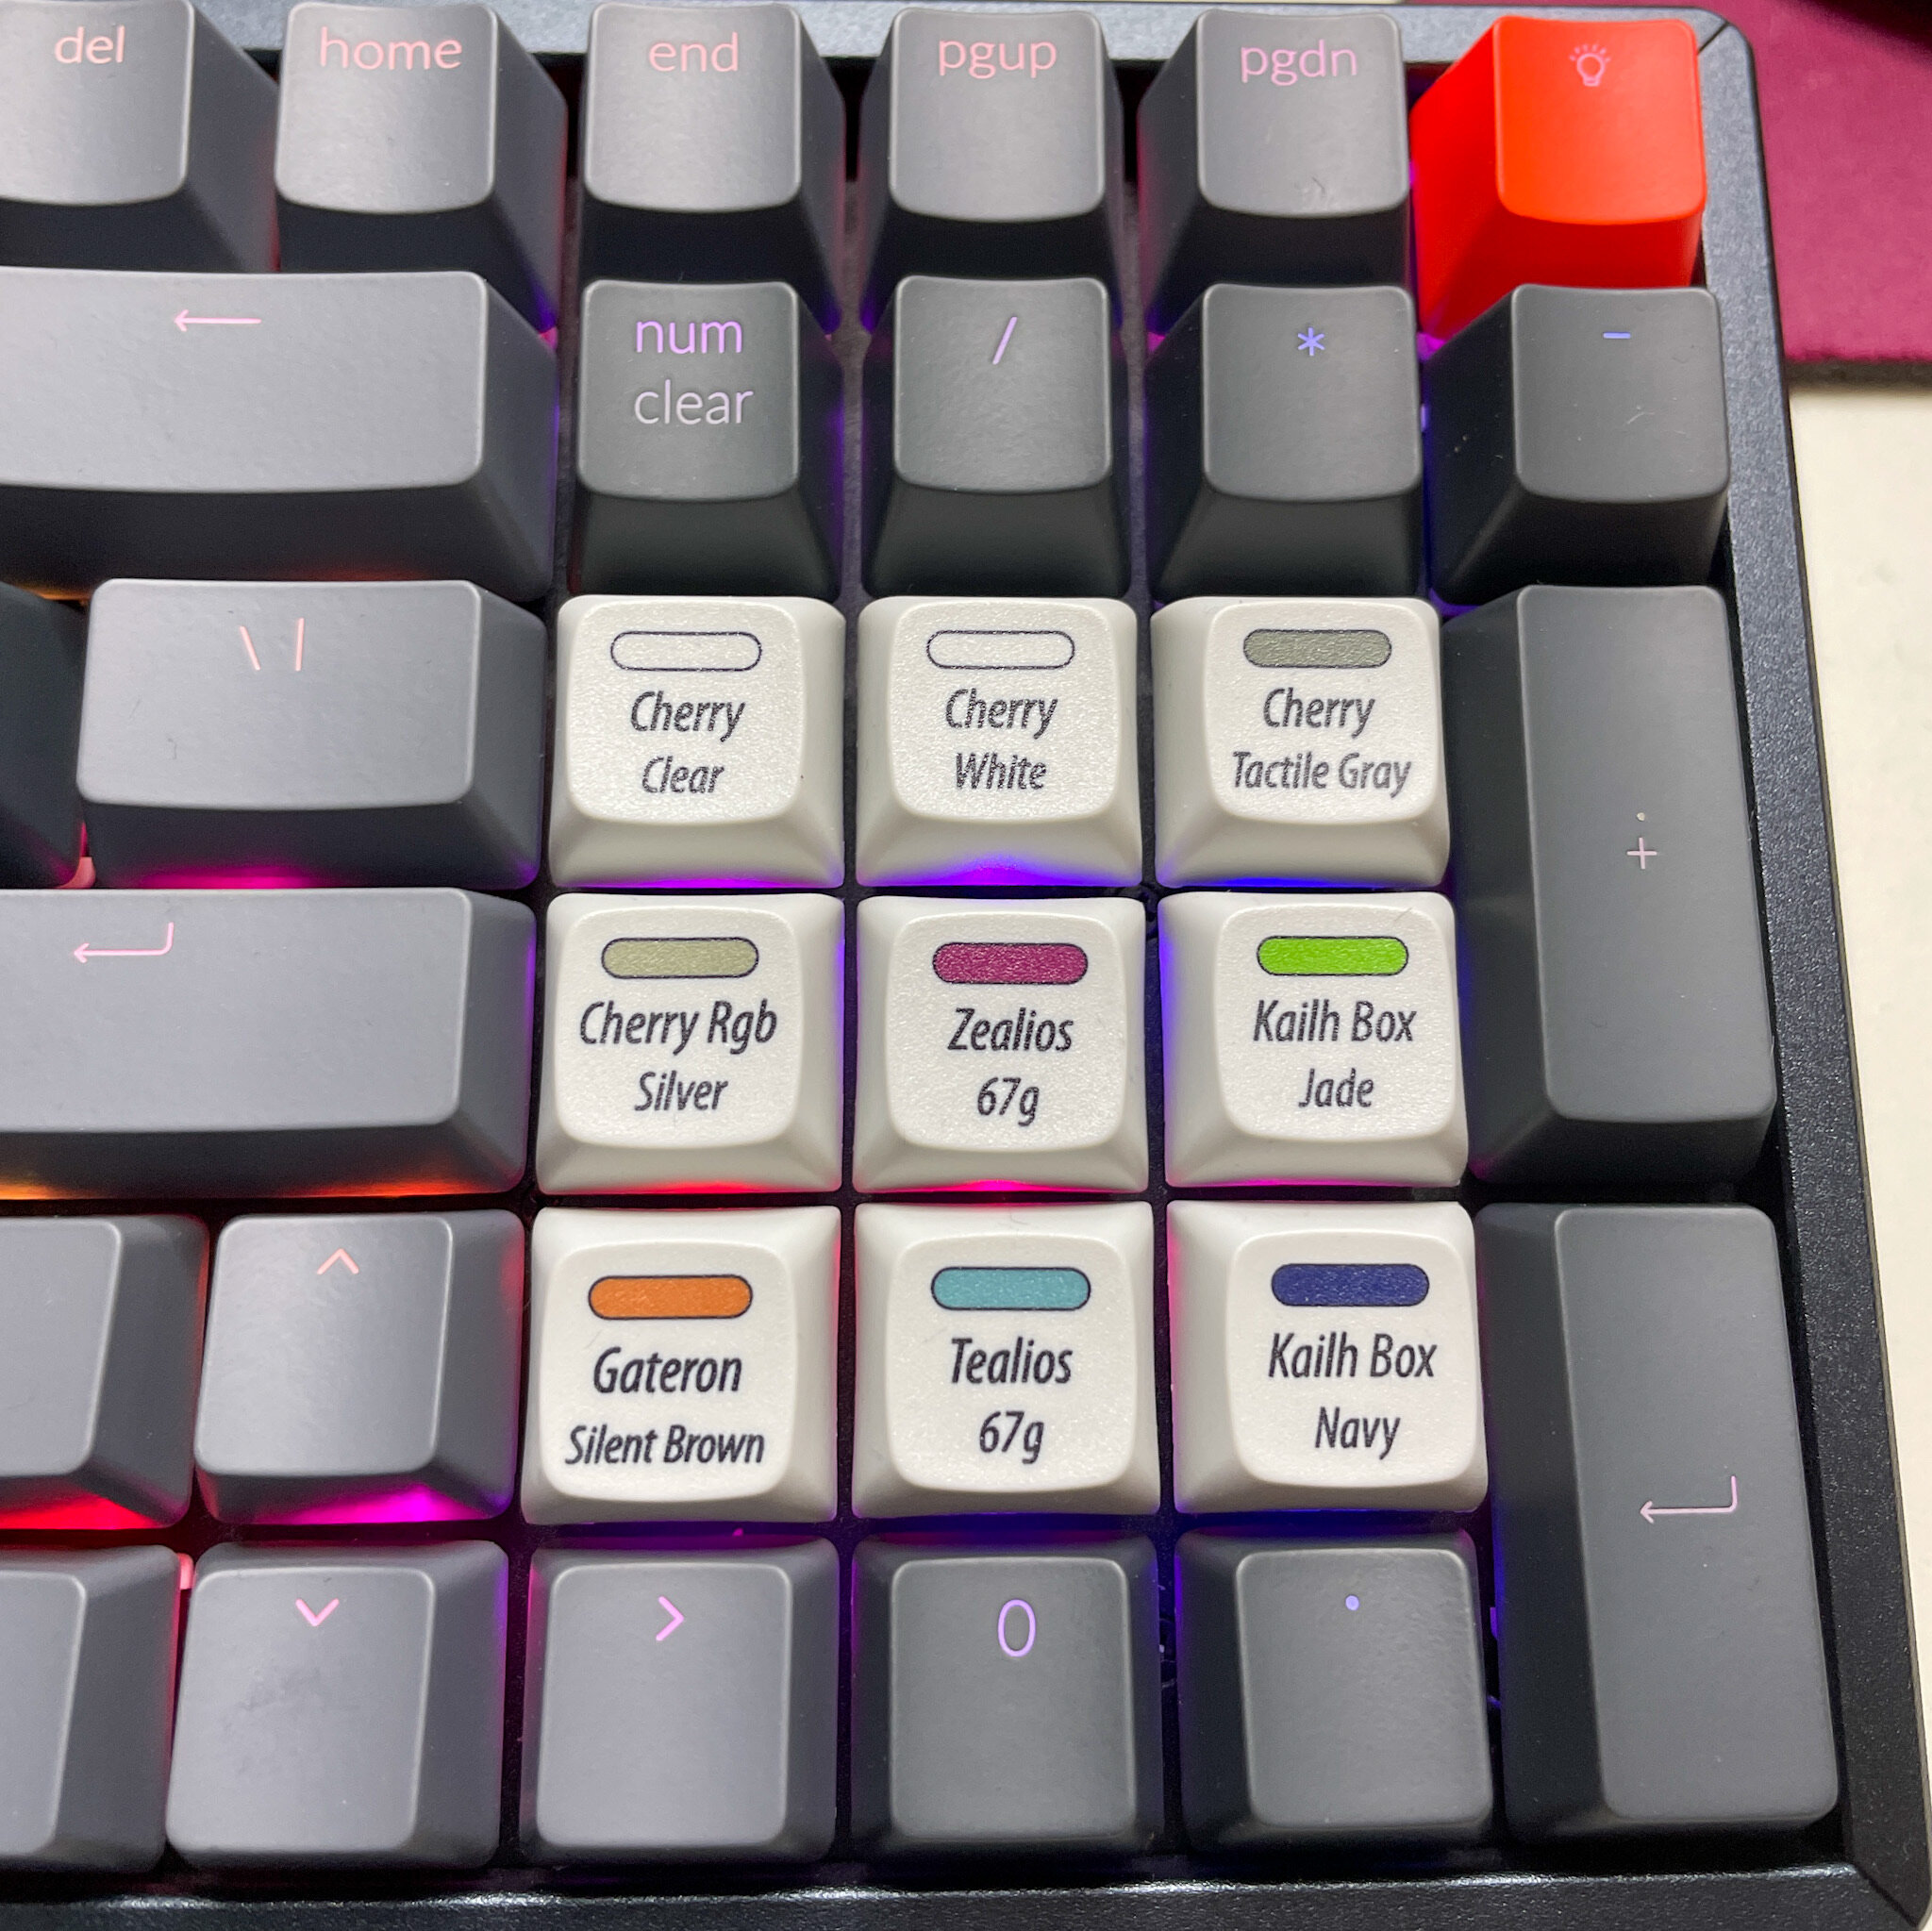
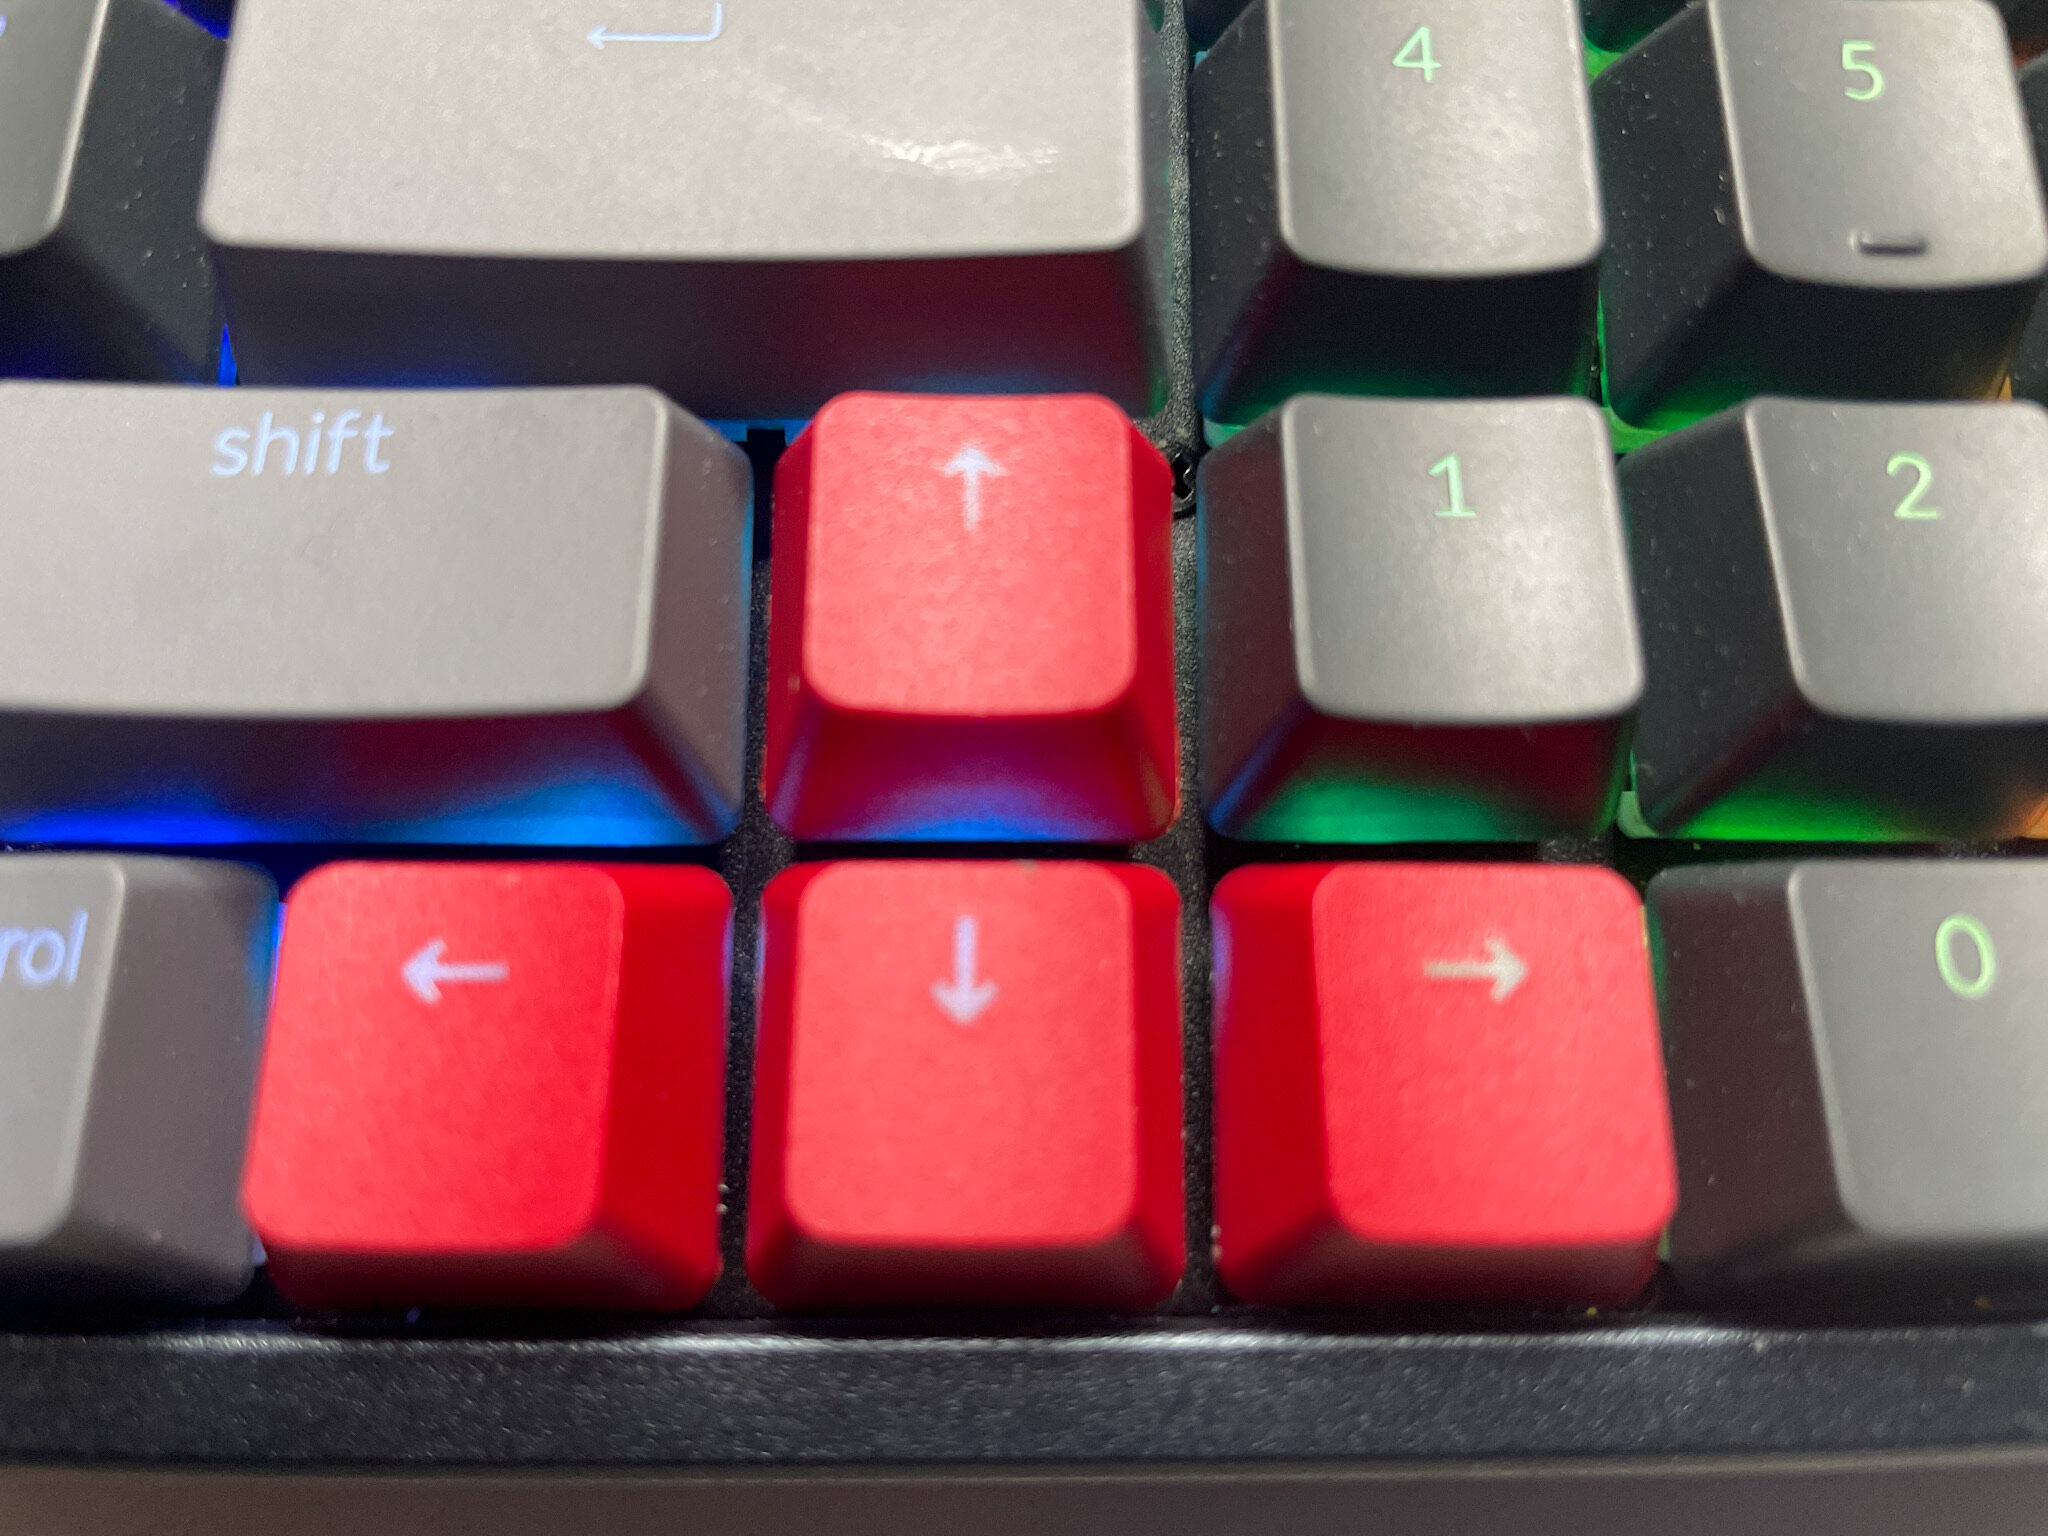
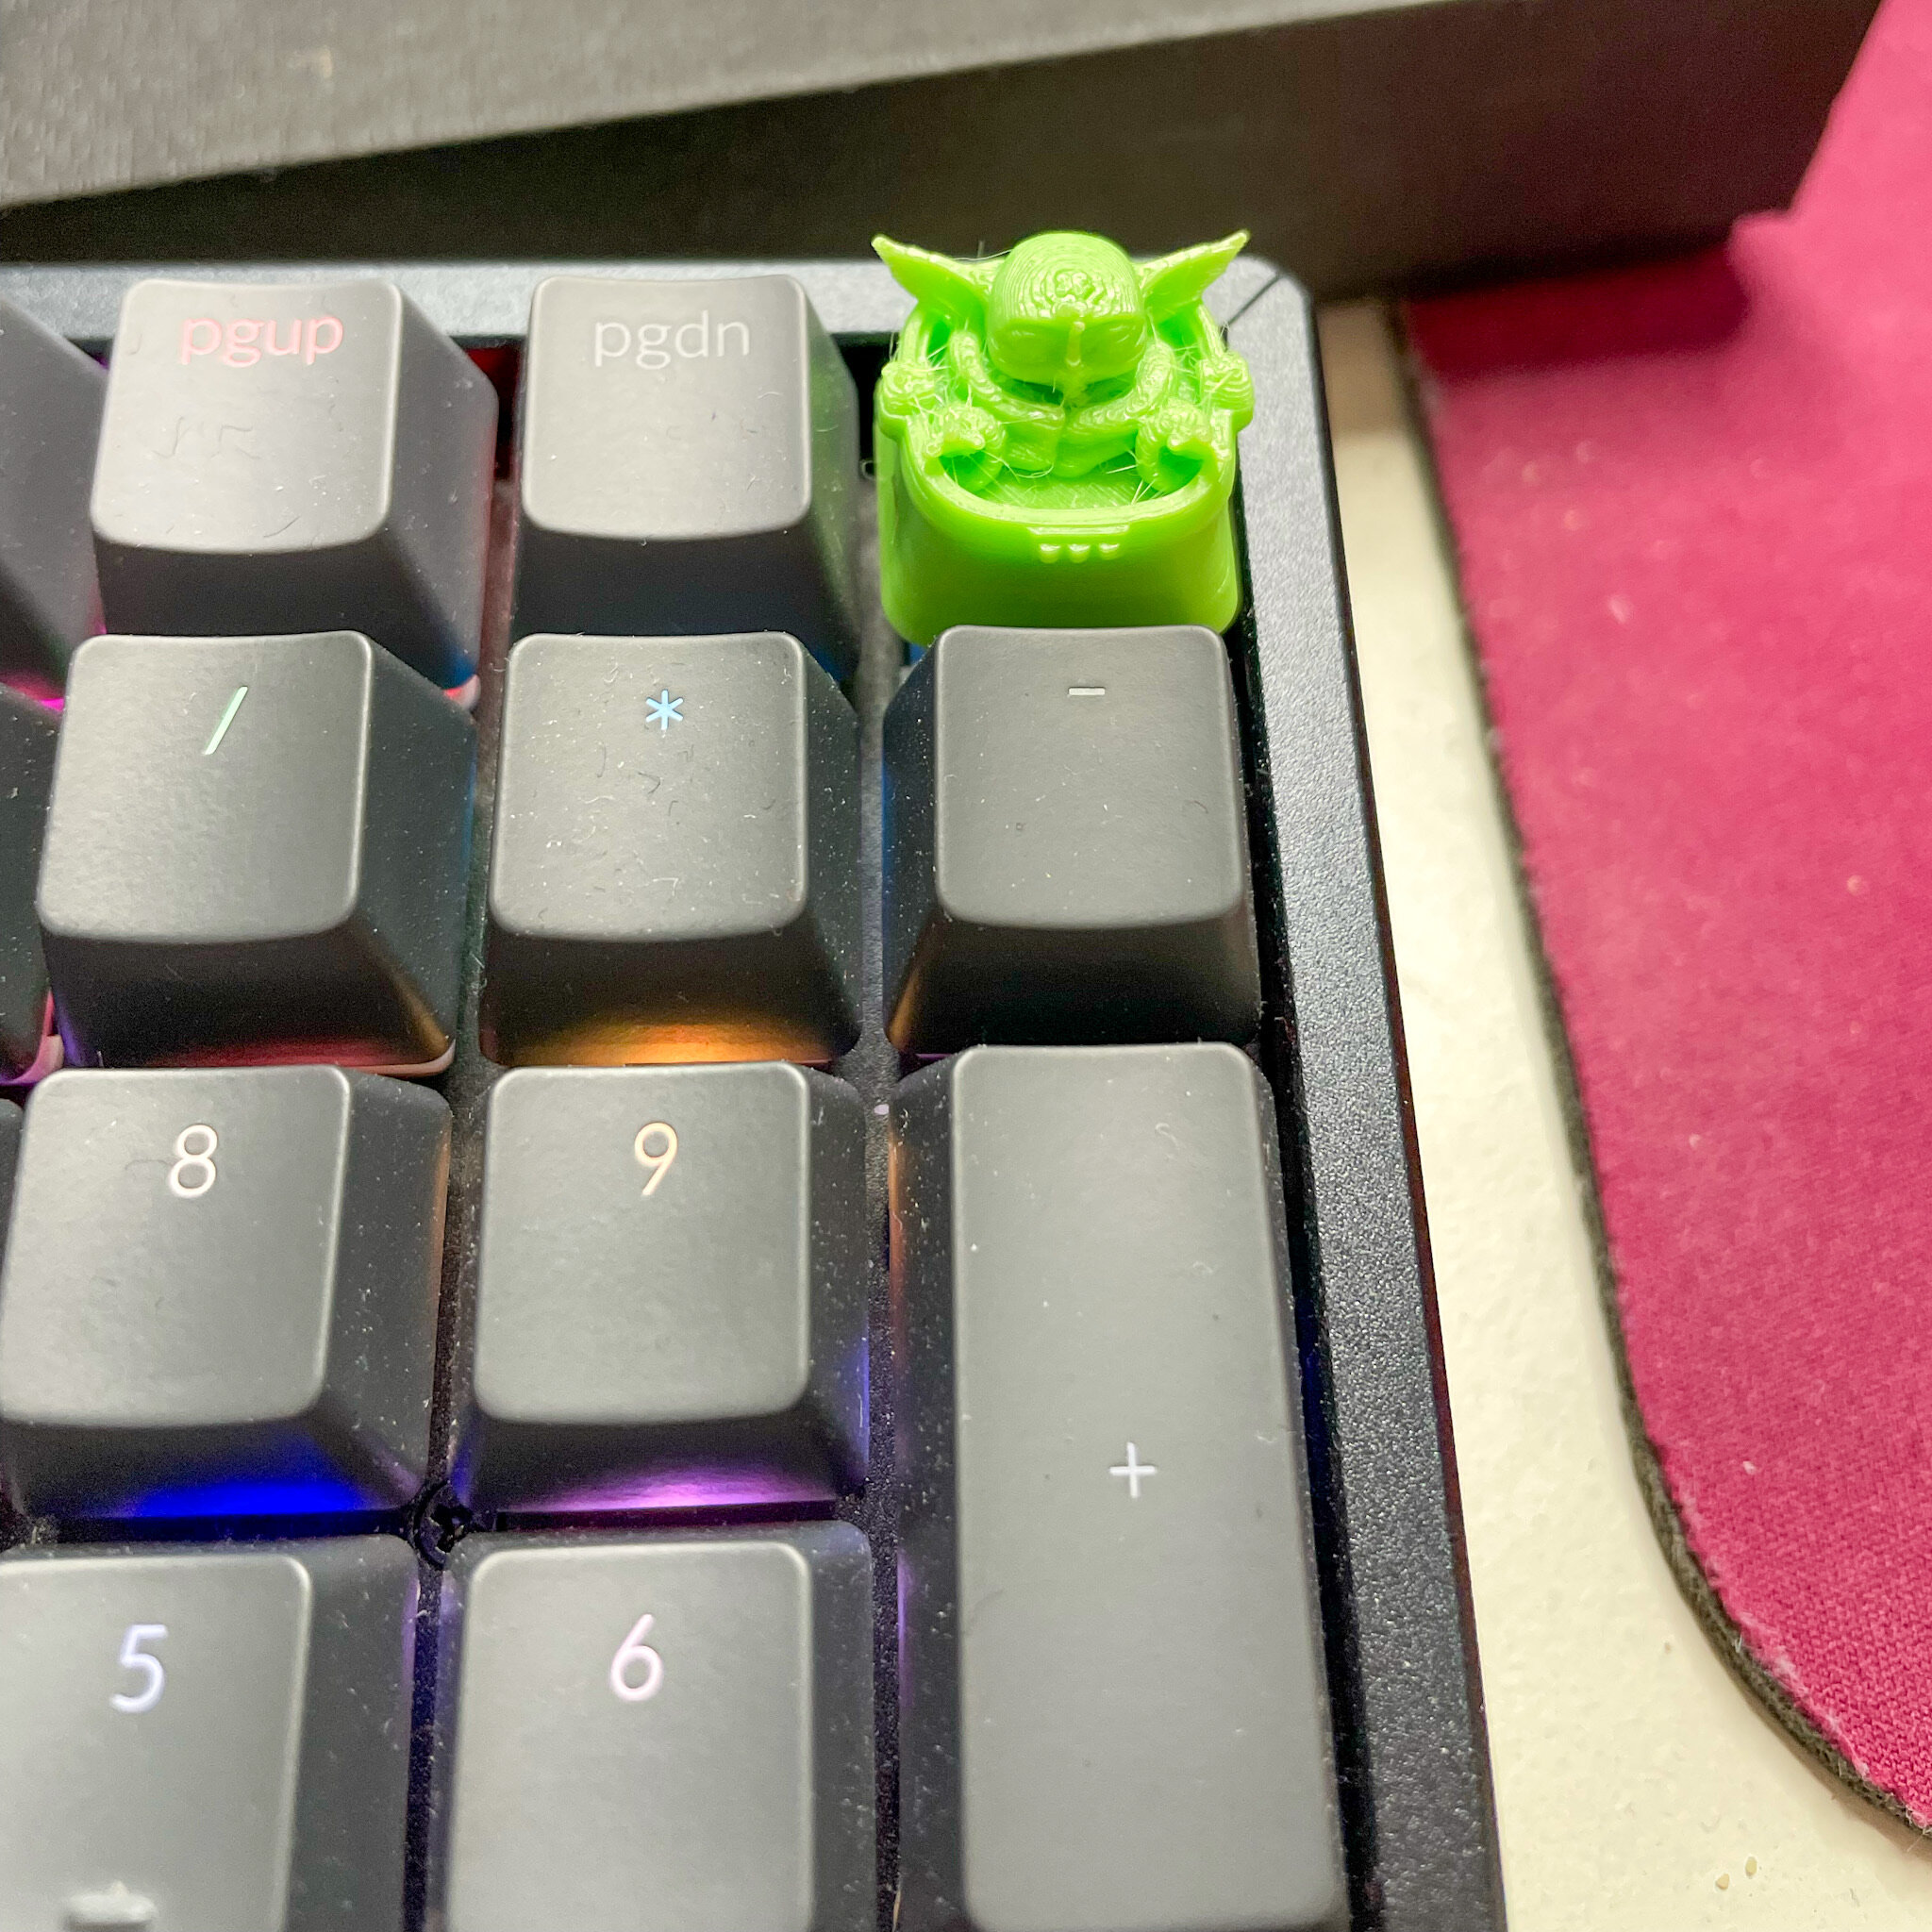
While waiting for my switches to arrive I started ordering some key caps. First, I ordered some contrast colored arrow keys, to break up the sections of my keyboard a little bit better. Next, I found my perfect space bar, which I’ll circle back to. Then, I got to thinking about printing my own key caps. It took me two tries, but I printed a pretty decent version of this Baby Yoda key cap that I was happy with. Printing key caps is definitely something I intend to explore more of.


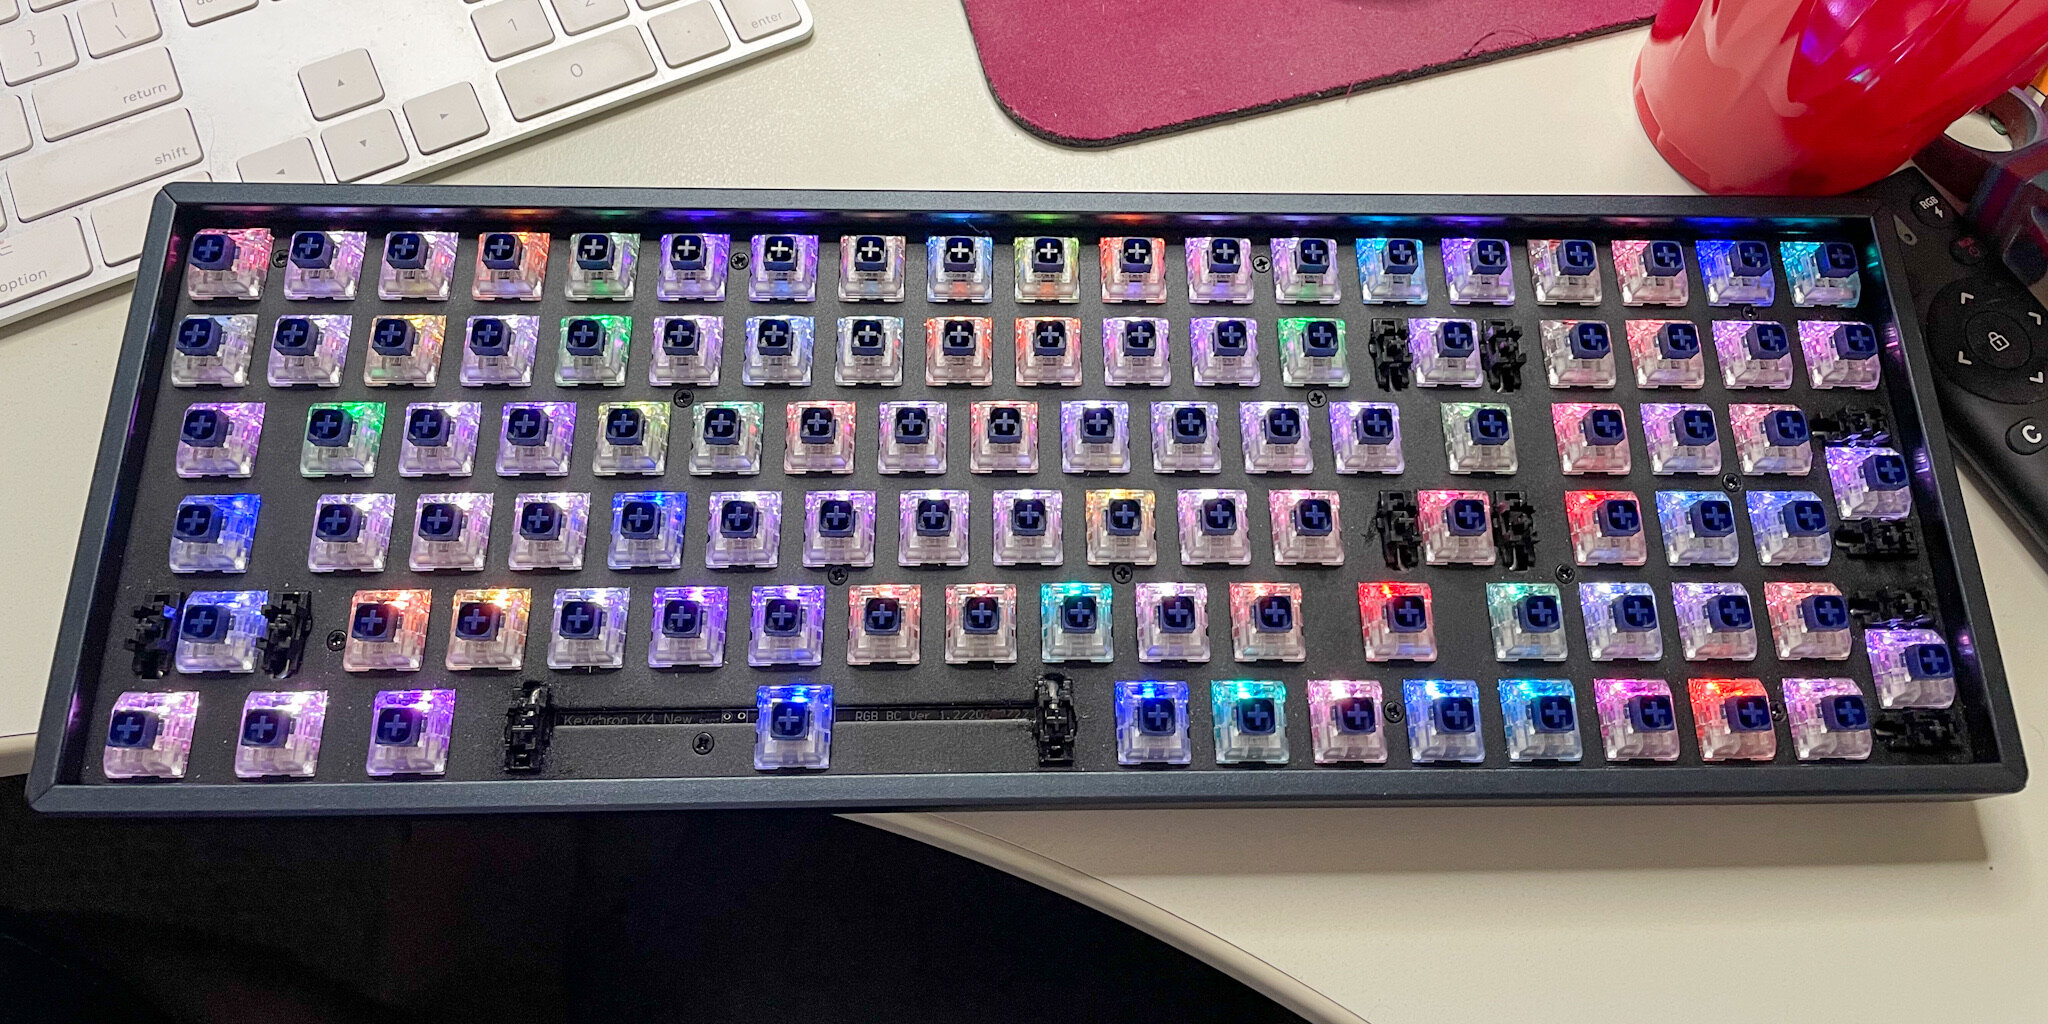
When my switches finally arrived I was quite excited, and then quickly overwhelmed. I had seen little clips of people swapping switches, and I swapped a few when I was testing the samplers, but I’d never even seen how long it took to do a full keyboard, let alone done it myself. Still, I knew this is what I signed up for so I started by stripping off all my keycaps (and making sure I had a good picture of where they went back to) and then pulling all of my switches. Finally, when the board was empty, I gave it a good cleaning to get a debris out of there before loading in the new switches one by one. I bent a few of the new switches in the process, but thanks to the RGB LEDs I was actually able to tell quickly with switches weren’t working in order to pull them and bend the pins back. I’m proud to say that I didn’t lose or waste a single. Switch in the process. One I had all the Crystal switches in I marveled for a moment at how cool the LEDs looked without key caps, but then it was time to put them back in place so that I could actually type, but not before getting a quick video to let you all hear just how clicky these switches are.
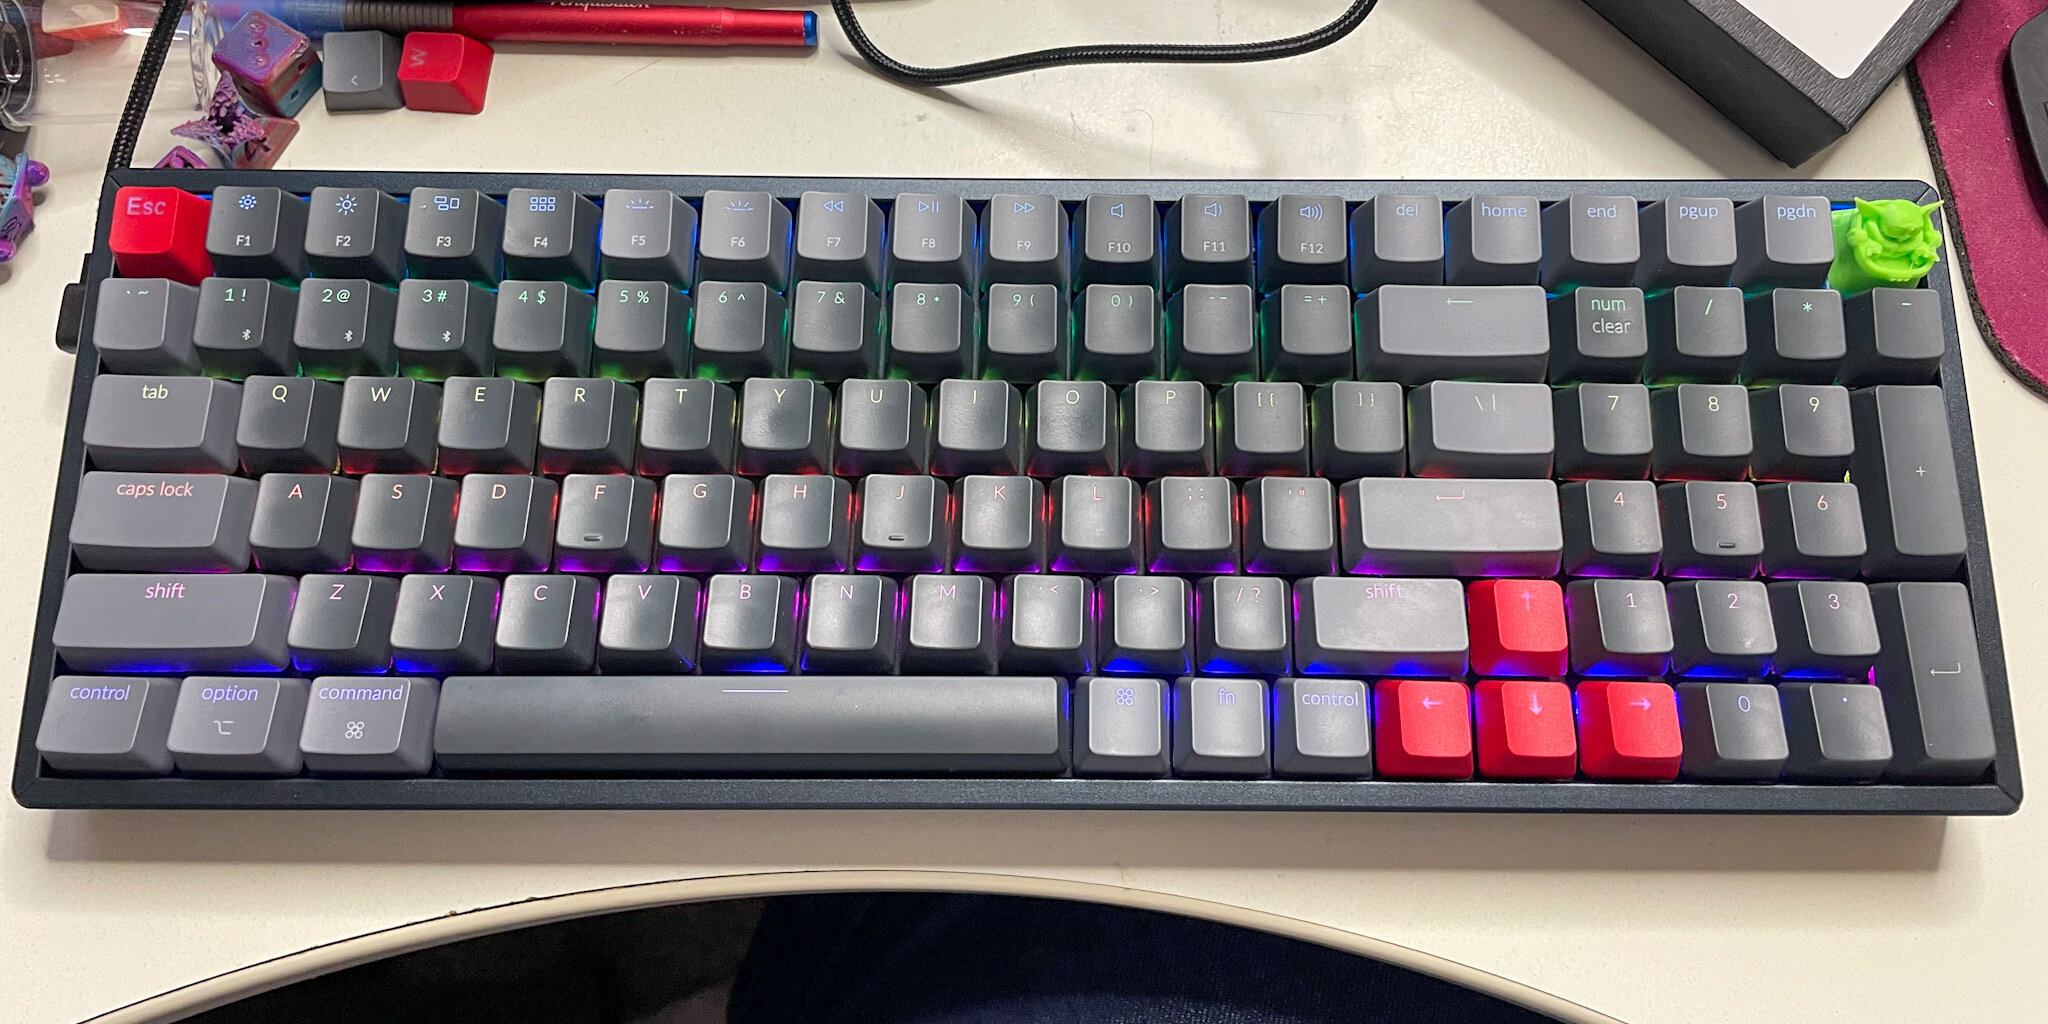
I thought that would be the extent of this post, but then in the middle of this week the space bar I ordered showed up, and it’s everything I dreamed it would be. I’d originally seen it on a different site for more money, but something about it made me feel like it was mass produced and I was being over charged so I hunted around and sure enough it was on AliExpress for just $6. I don’t mind waiting longer for a better deal, so I ordered it, and I couldn’t be happier with the results.
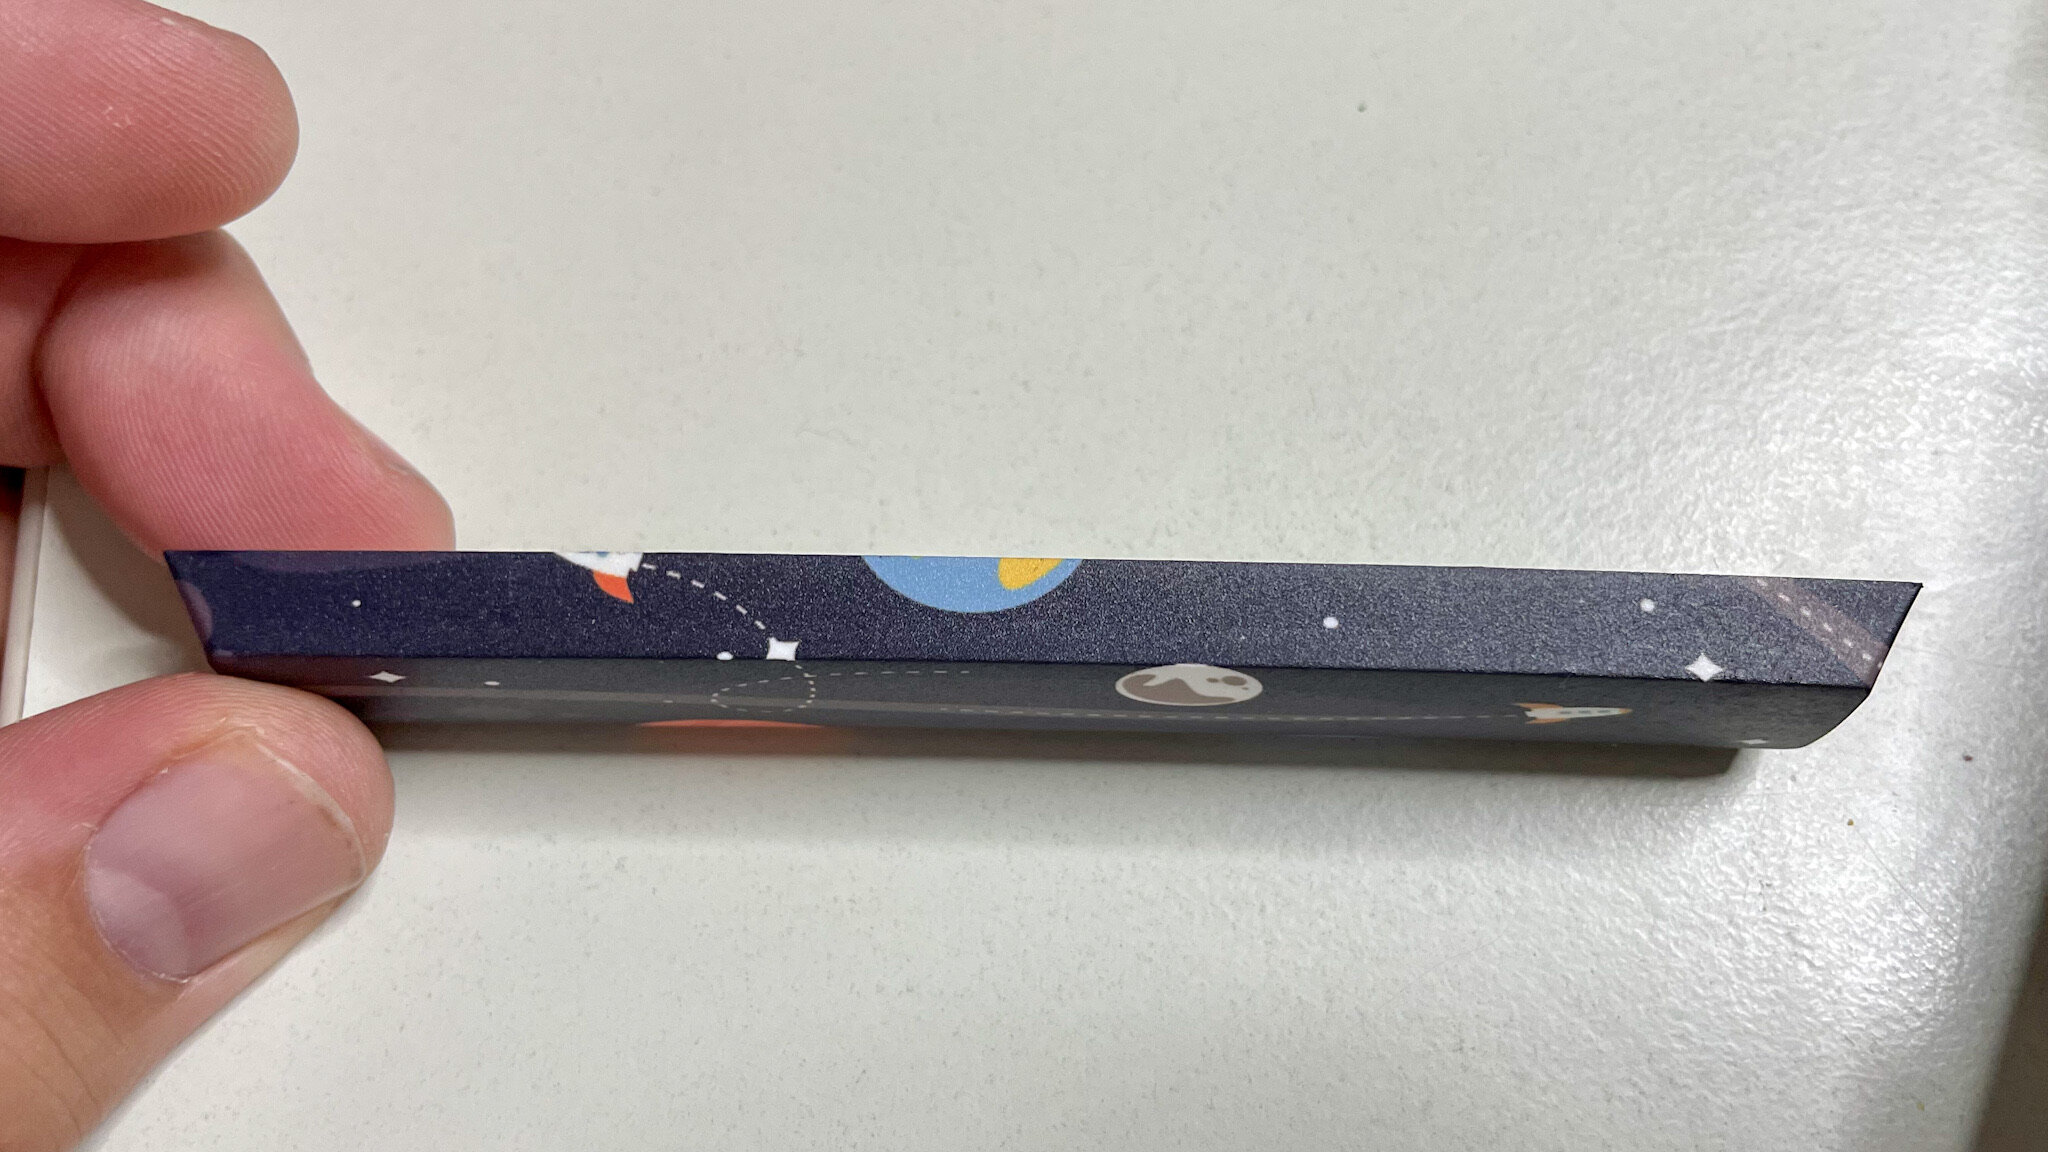
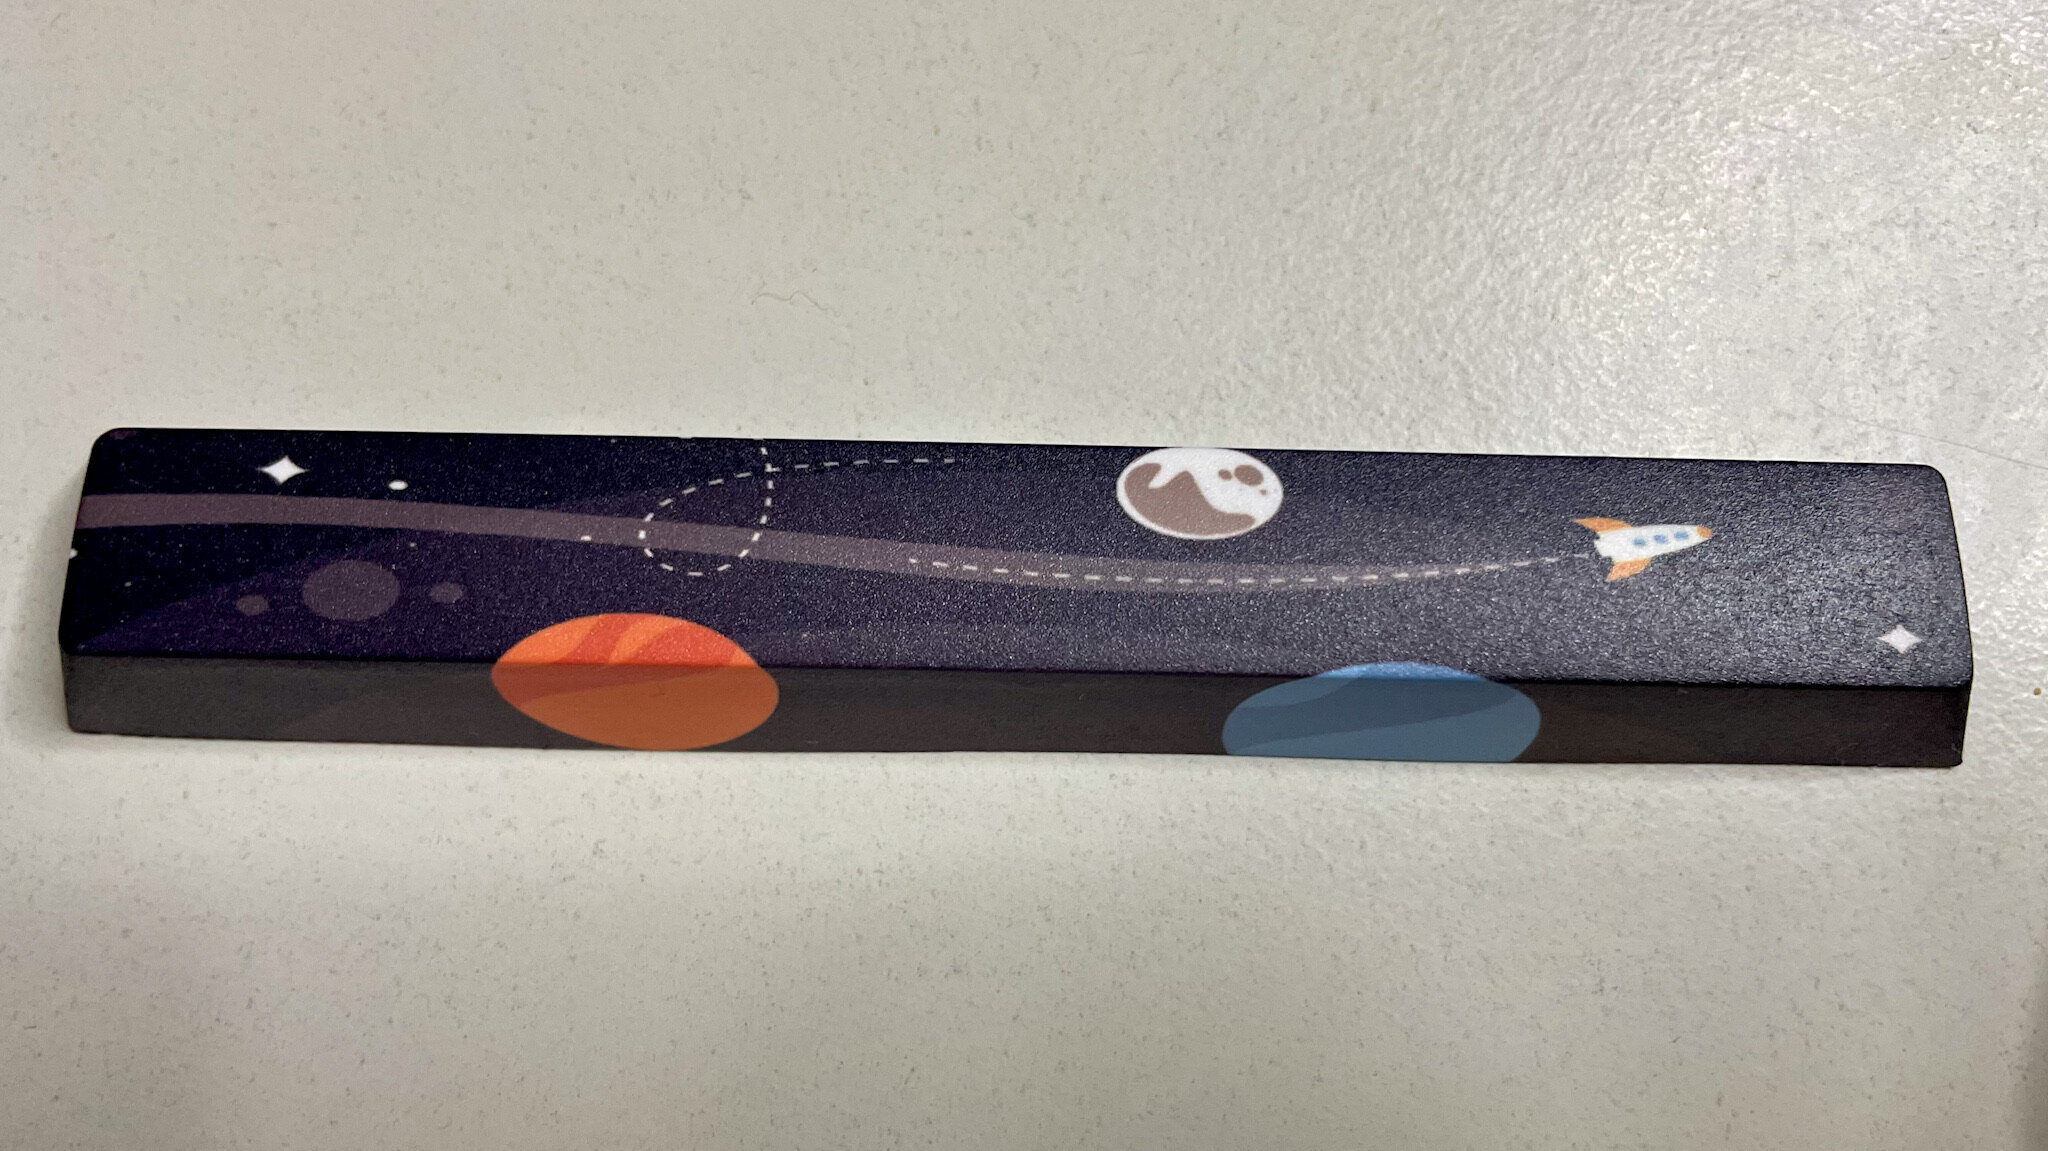
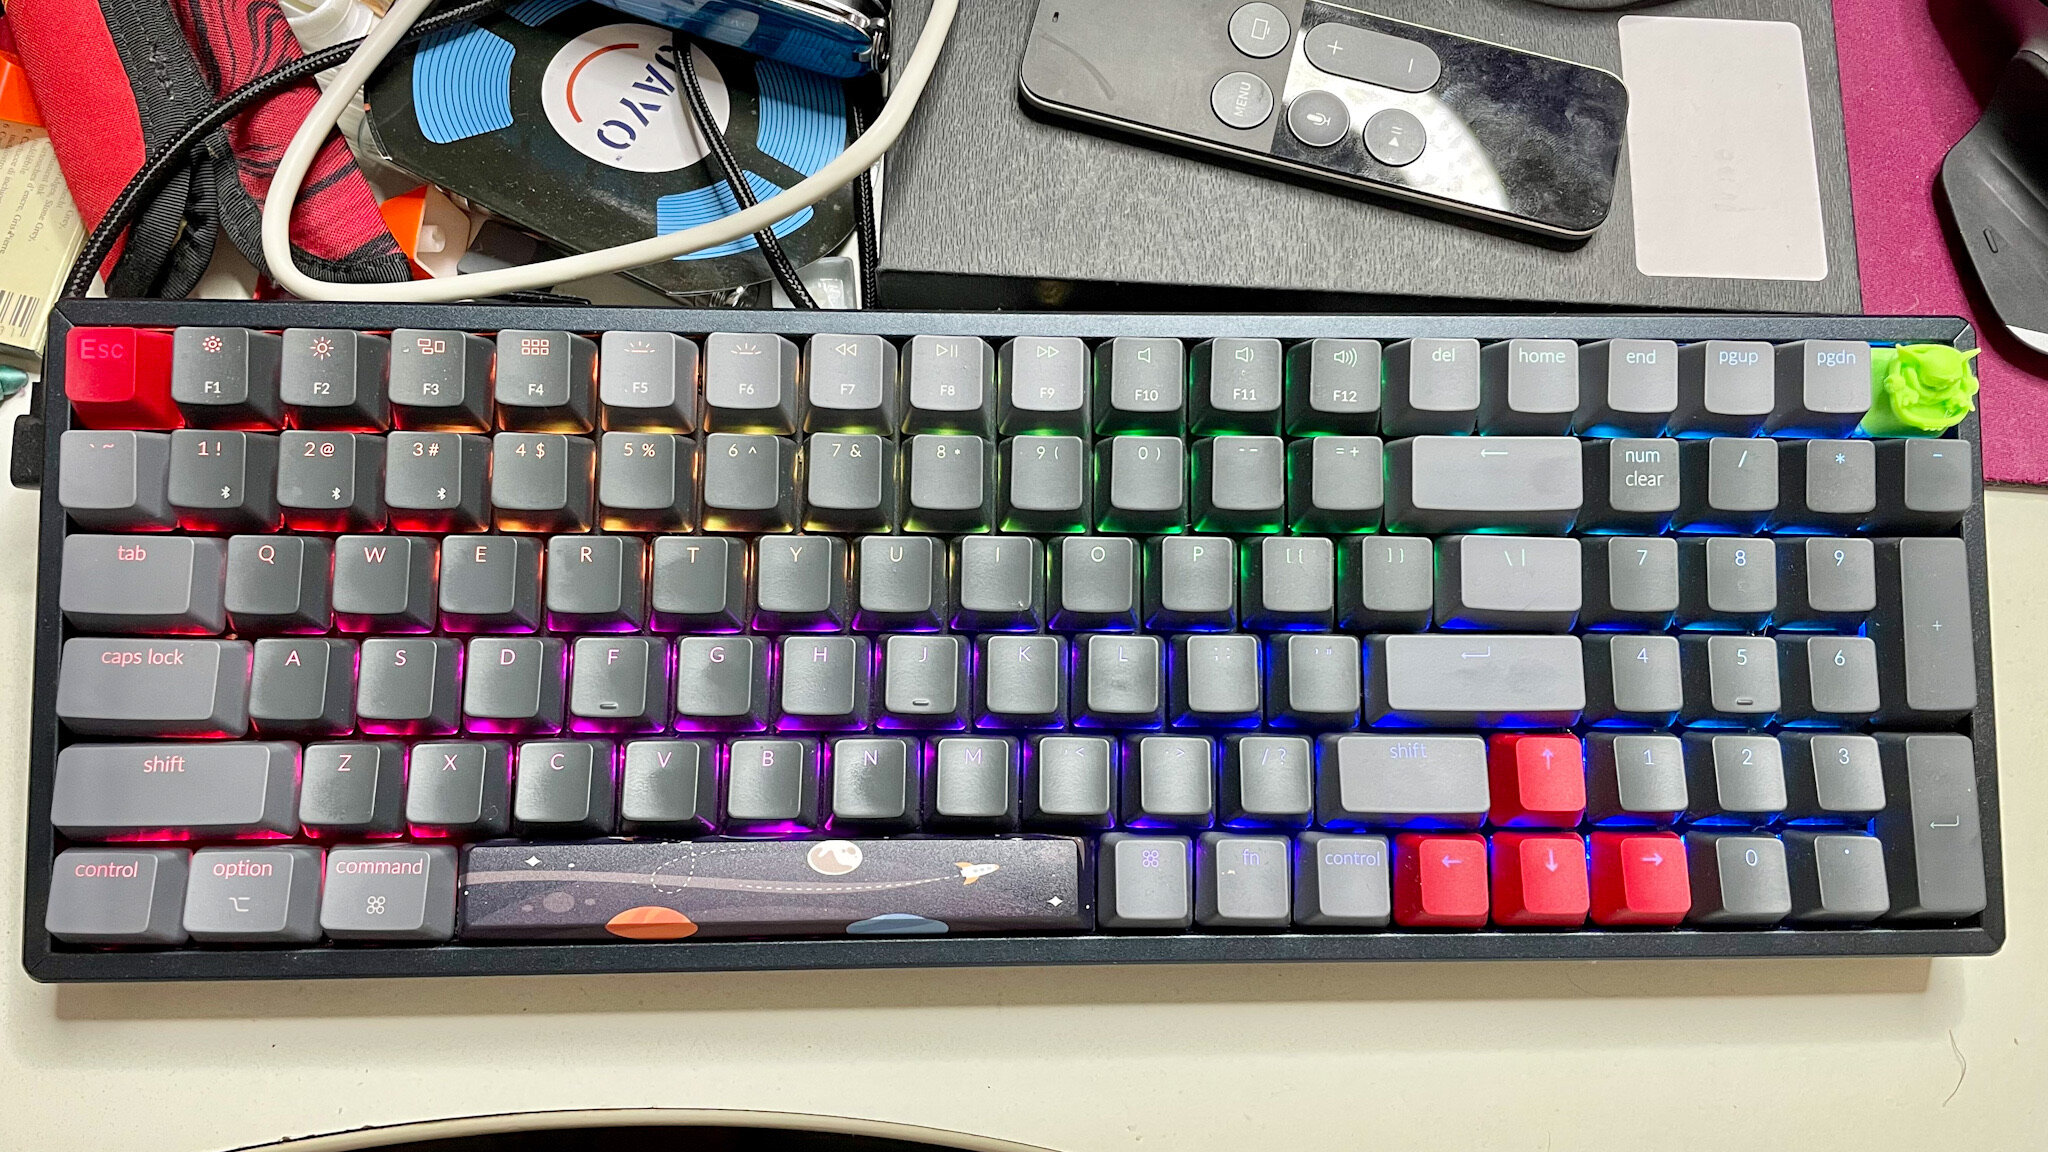
Now I have more key caps to purchase, but there’s no rush. I expect that my red arrow keys will probably be replaced over time by something more permanent, but my space bar might be a nice permanent accent piece. Maybe between that and Baby Yoda I’m looking for a space motif over all, only time will tell.
I’m about to leave on a big family vacation tomorrow, and for the first time ever I’m planning to bring a keyboard with me, not just use the one built in to my laptop. We shall see how that experience goes. Maybe this is the “one time” I spoke of earlier, or maybe this is my new thing. Either way, I’m excited to try out a new experience.
On a housekeeping note, the Penquisition shop will remain open while we are away, but any orders placed July 31st, 2021 or later will not begin shipping until our return the week of August 9th, 2021. Please feel free to place orders in the interim, and make use of coupon code “DOUGLASS” during this time for free shipping on any orders of $10 or more.